> For the complete documentation index, see [llms.txt](https://help.tillit.cloud/tillit/llms.txt). Markdown versions of documentation pages are available by appending `.md` to page URLs; this page is available as [Markdown](https://help.tillit.cloud/tillit/knowledge-base/users/user-authentication.md).
# User authentication with SSO
## SSO.
Many organisations may often have existing employee accounts for other services, such as Microsoft and Google.
If that is the case, TilliT can utilise them to manage TilliT users.
Commonly known as Single Sign-On (SSO), you can connect to TilliT with any service using the SAML standard.
SAML is supported by many providers including **Microsoft**, **Amazon (AWS)**, **Google** and many others.
We recommend discussing this with a member of the TilliT Support team.
Contact us to discuss using SSO.
## Azure Active Directory (Microsoft)
This guide will cover setting up TilliT with Azure Active Directory. Each tenant can now set up Single Sign-On (SSO) directly from Account Settings, allowing secure and streamlined access to the platform through your identity provider.
Click on your avatar on the top-right, choose **Account**. You will be presented with the Account page interface below. Click on **SSO** setup and **start the SSO Setup**.
You will need the provided Entity ID and Reply URL to set this up in Azure.
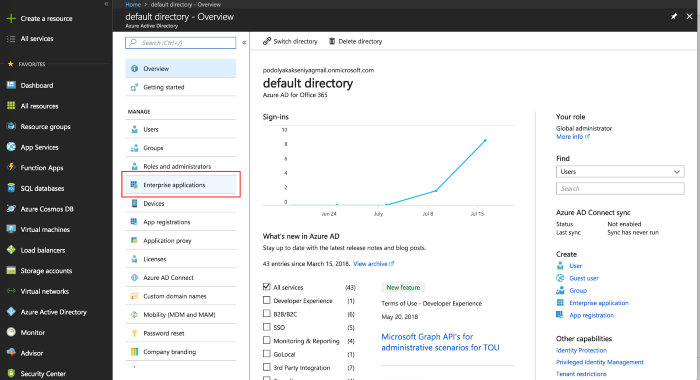
Open Azure Portal , on the right side menu choose “Azure Active Directory”.
Start the process of creating a new Enterprise application. Select "non-gallery application". Give it a name (TilliT?).
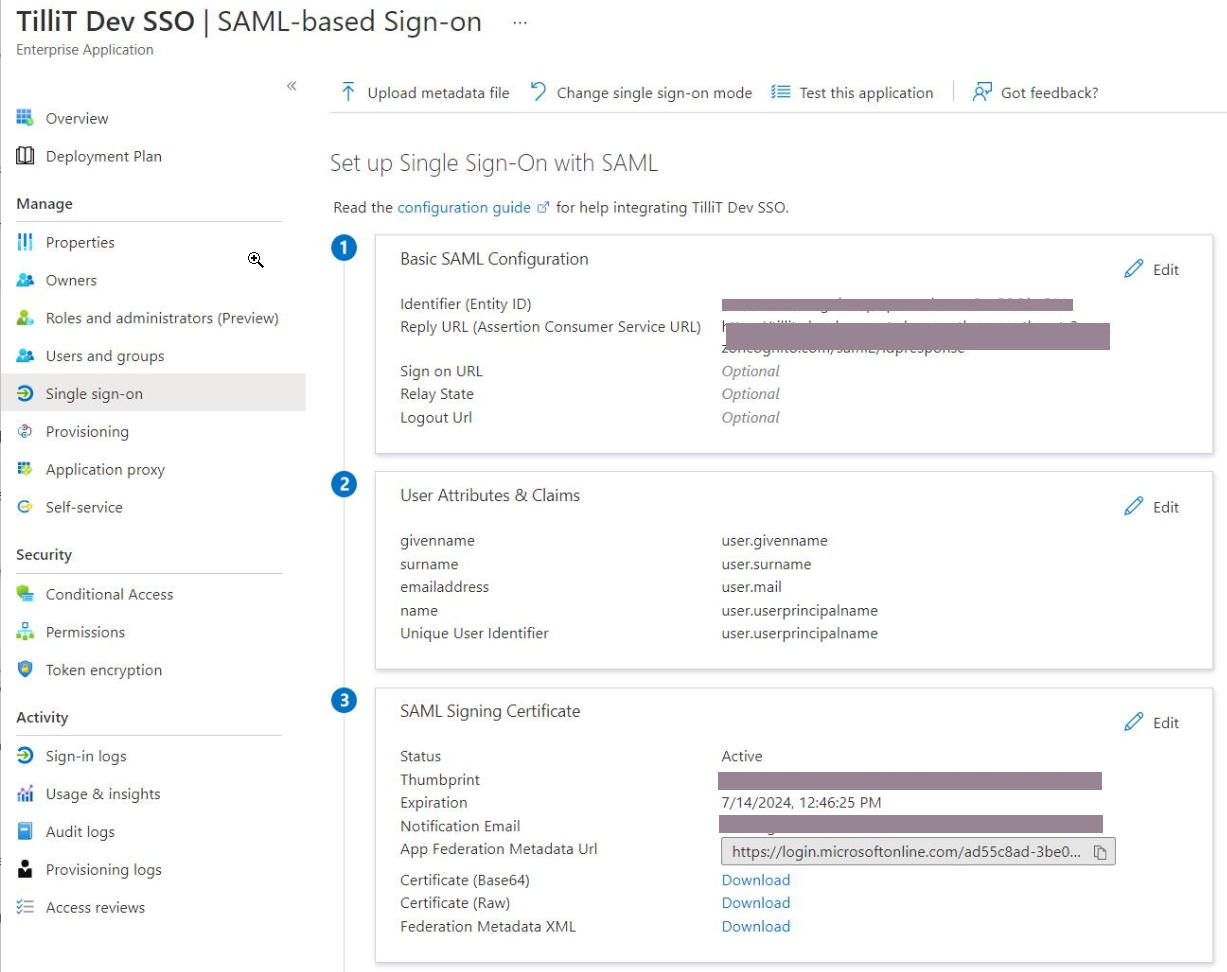
Inside the newly created application, head to Single sign-on and pick SAML.
In the Identifier (Entity ID) and Reply URL, enter the data you've received from the Account page.
Save your changes, it should look like this:
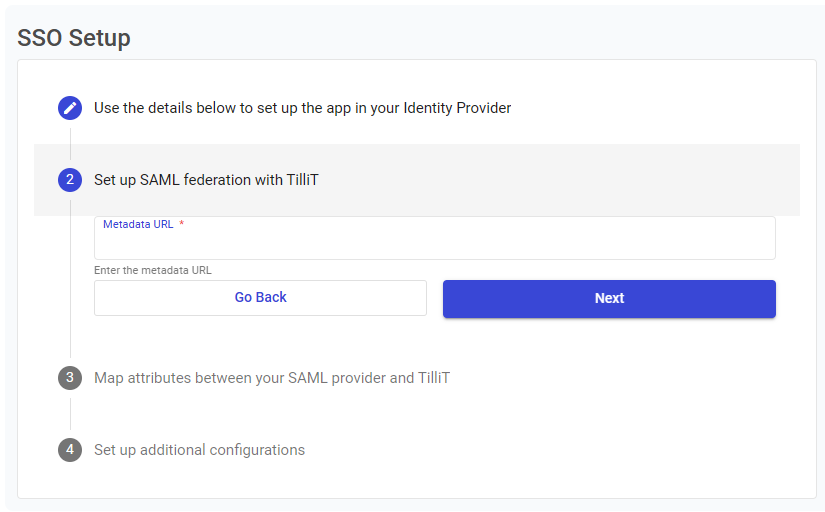
Finally, copy the App Federation Metadata URL and paste that into the second step of the setup form in TilliT DO.
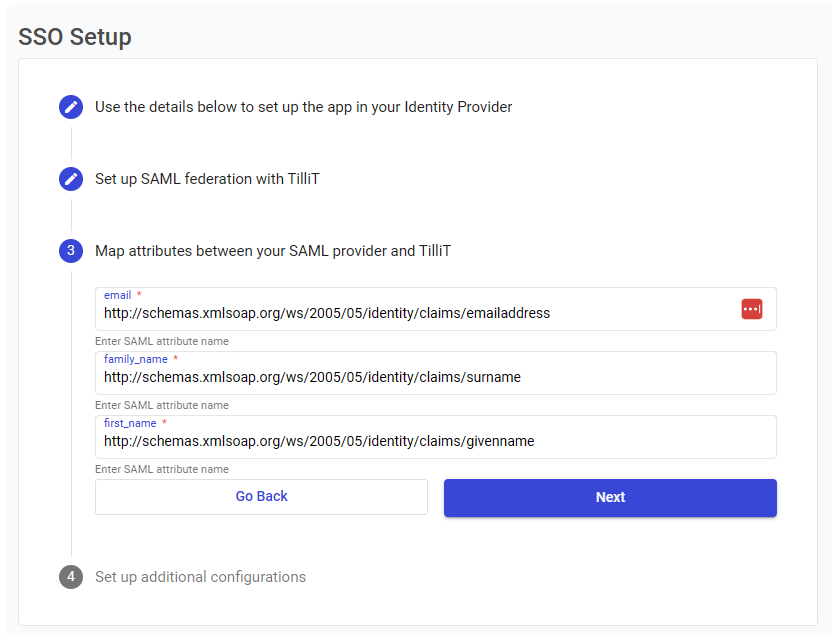
In the next steps, the attributes are mapped with some defaults but feel free to edit them.
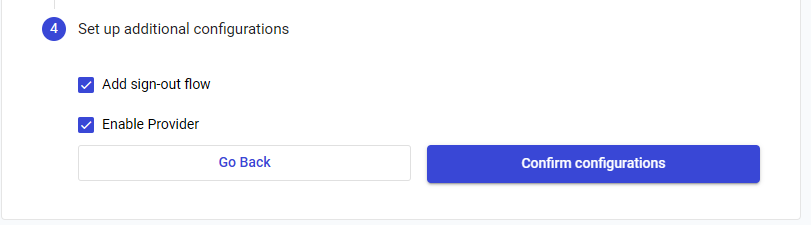
Finally choose your additional configurations, it is crucial to have the provider enabled
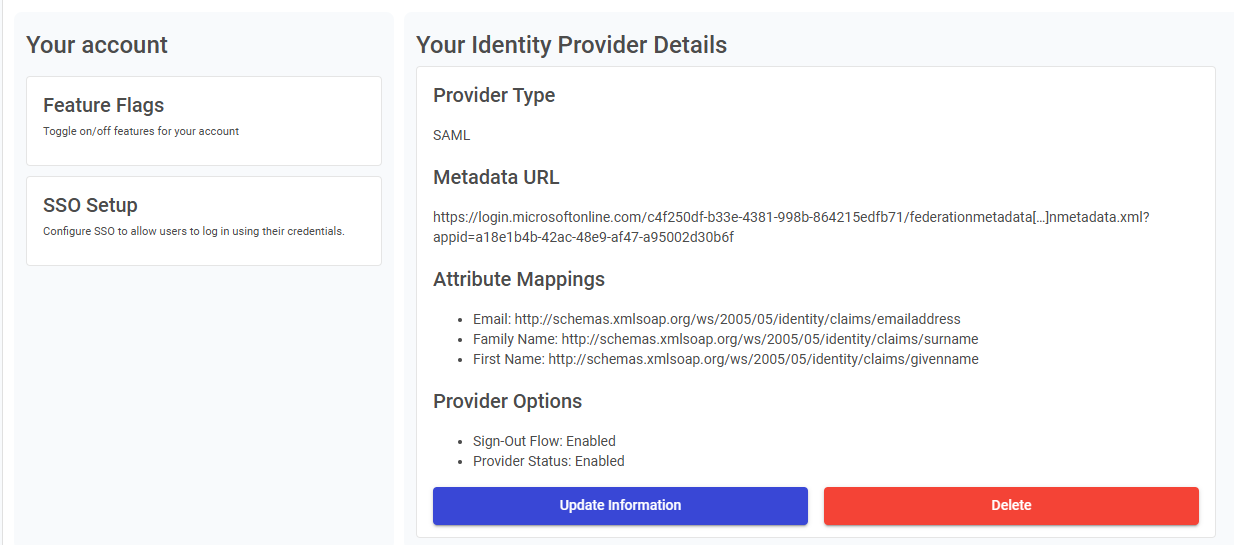
After creation your SSO Setup page will be populated with values like this.
### Just In Time Provisioning
You can model your TilliT Groups and TilliT Roles in your Identity Provider and send them as Group claims in your SAML configuration.
{% hint style="warning" %}
**This will take precedence over any role & group assignment performed within TilliT. This means user role and group assignment is now handled by IT or those who manage your IDP.**
{% endhint %}
**Example:**
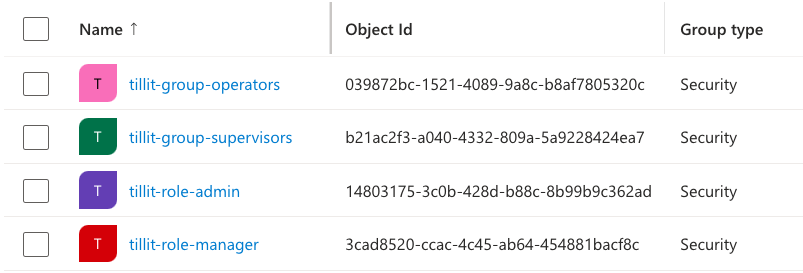
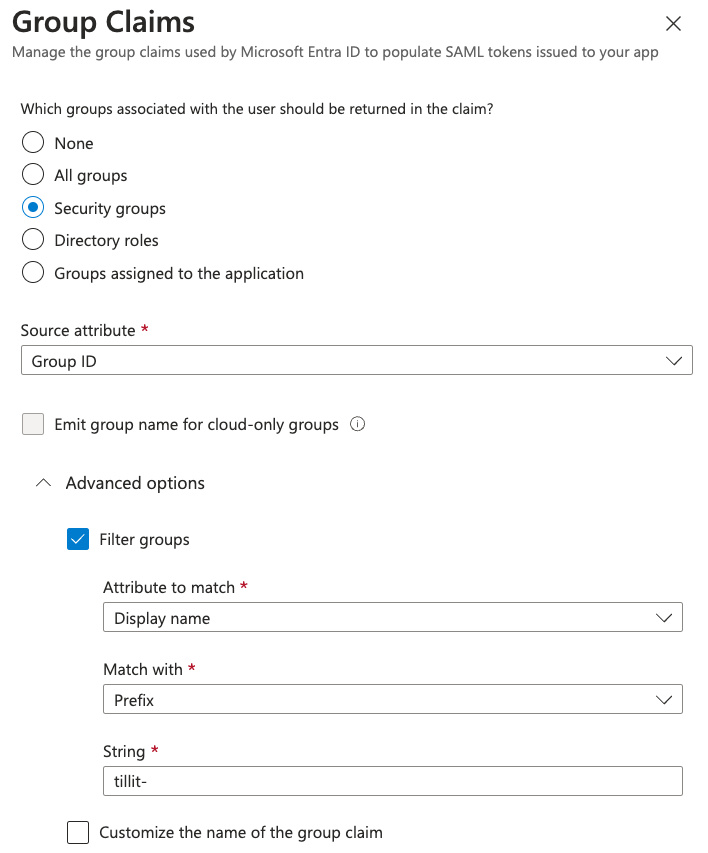
Here we have added the groups claim in to our Enterprise Application in Azure. We have modelled our Azure Groups using the “tillit-” prefix and only send those in the SAML claims.
1. Model your groups within your IDP, ensure you have created all [groups](/tillit/knowledge-base/users/groups.md) and [roles](/tillit/knowledge-base/users/permissions.md).
2. Add the groups claim to the SSO configuration for your Enterprise Application
3. Contact support and send through the Group Ids like shown in step 1 for all the TilliT groups.