Tolerances
Overview
Setting a tolerance allows you to define operational limits during an activity.
Tolerances in TilliT consist of 3 properties:
Lower Limit - the minimum numeric value of a measured asset variable where, if not met, will have a potential effect on the process operation.
Target- the optimum value which, if controlled, can guarantee compliance with the process operation.
Upper Limit - the the maximum numeric value of a measured asset variable where, if exceeded, will have a potential effect on the process operation.
If you set a target, but both Upper Limit and Lower Limit are left blank, you must meet the Target precisely for the activity to pass. In this scenario, the target can be numerical or text/string.
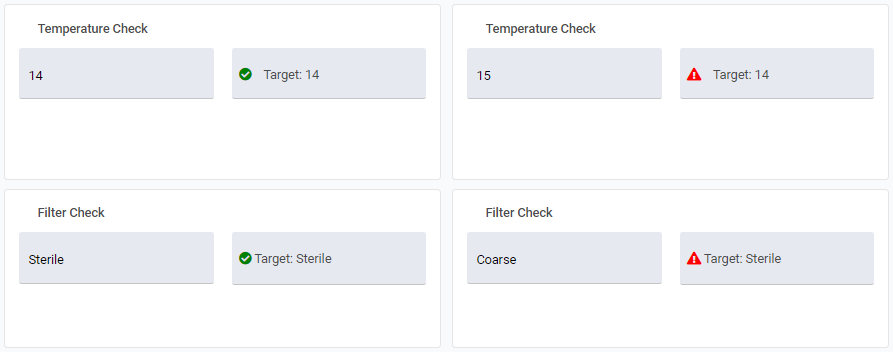
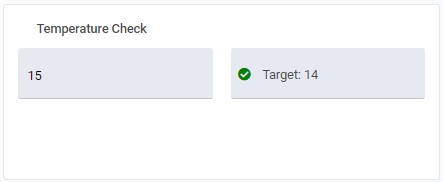
If you do decide to set both an Upper Limit and Lower Limit, then this defines the range in which the value can operate. Once these are set, the value must be numerical.In the above example, 15°C doesn't match the target precisely, so will fail. If we add an Lower Limit of 12, and an Upper Limit of 16, then 15°C would pass:
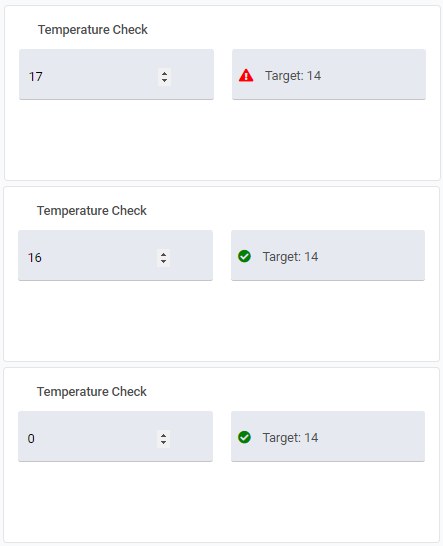
You do not have to set both limits, it is possible to set solely an Upper or Lower Limit. For example, you may have a maximum temperature that you need to operate at, but no minimum. If we were to change this to an Upper Limit of 16 and no lower limit, the activity will pass with any value that is 16°C or below.
When setting the Target, Upper Limit and Lower Limit, you can simple hard code the values if they are the same every time (e.g. the pressure an extruder can operate within, as defined by the manufacturer).
Tolerance Source
Tolerances can be stored in multiple places within TilliT.
You can choose from:
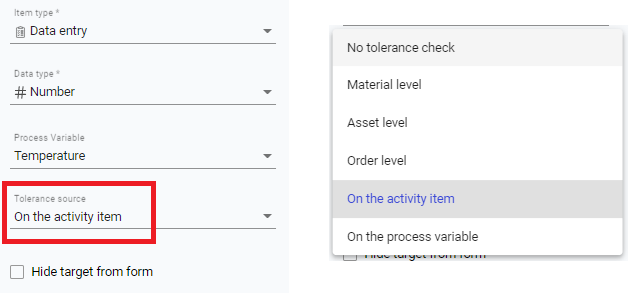
No tolerance check - removes tolerance check from the element.
Material level - uses the tolerance defined at Material level.
Asset level - uses the tolerance defined at Asset level.
Order level - uses the tolerance defined at Order level (either sent with the order or defined in an activity).
On the activity item - allows you to define tolerances within the item properties of the element. A Process Variableis required but you can fill out new constraints and limits yourself.
On the process variable - uses the tolerance and constraints defined on the Process Variable.
Update Order Tolerance
If you use Order level tolerance, you may want to update the tolerance during an order. This can be done using the Update Order Tolerance item type in the activity template. This requires a pre-defined Process Variable (see Process Variable).
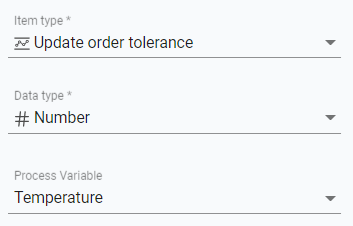
It is not required to have defined a tolerance on the process variable for Update Order Tolerance to work. In the above example, we have set it to a process variable that we have named temperature.
When an order level tolerance has not been set, the operator is presented with the following:
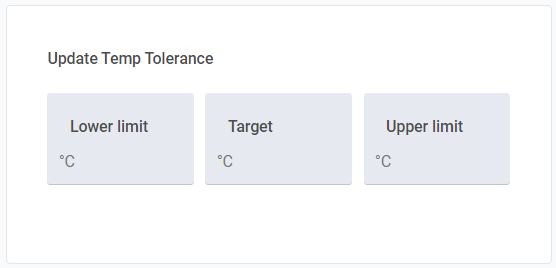
The operator can update Lower Limit, Target and/or Upper Limit. Take caution; if any are left blank, and there is not prior order level tolerance, the value will be set as 0.
If an order level tolerance has been set, the fields will be pre-filled with the current order level tolerance:
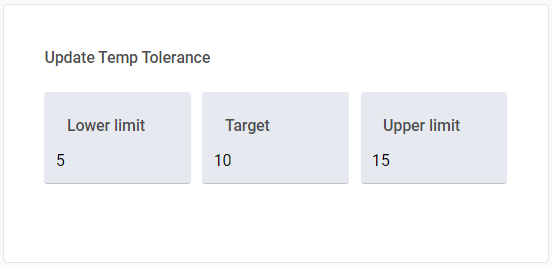
The operator can update Lower Limit, Target and/or Upper Limit. Now, if any are left blank, the original value will be retained. For example, if I were to delete the lower limit, in the above screenshot, when submitted, the value would remain as 5. If I wanted it to be 0, I must enter that value.
Calculated Tolerances
Another way to achieve dynamic tolerances is to use JavaScript calculations, same as that used in the Evaluate Data types & Dynamic Note & Calculations data type.
If you set the Tolerance Source as On the activity item, then you can reference Item Keys and Attributes within these calculations. However, if you set the Tolerance Source to anything else, then you can only reference Attributes.
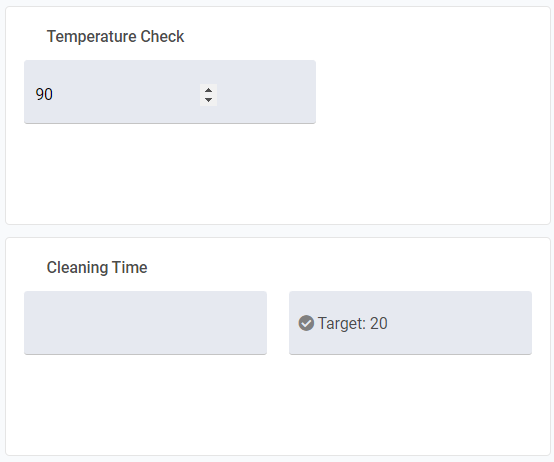
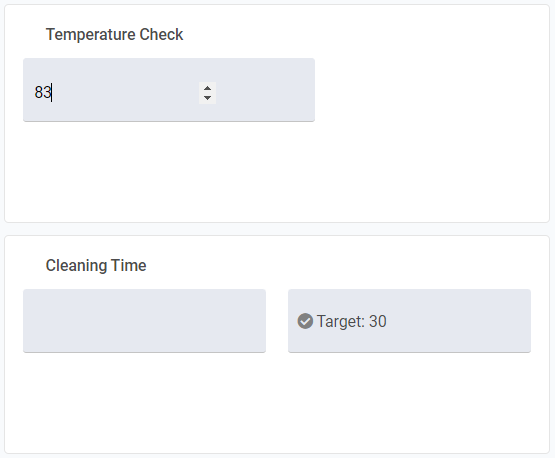
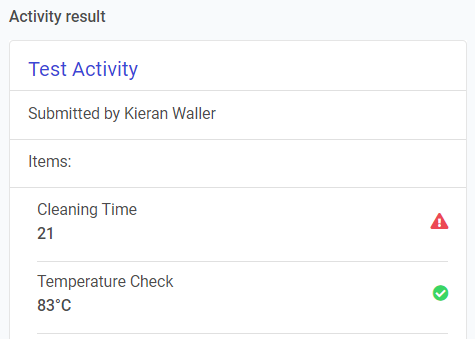
Now, the tolerance can changed based on other factors. For example, if the temperature during a clean drops below 85°C, then we can state that the cleaning time must be at least 30 minutes. If it stays at 85°C, or above, then it can be as low as 20 minutes. There is no upper limit required here, so we can use the following calculation in the Lower Limit and Target:
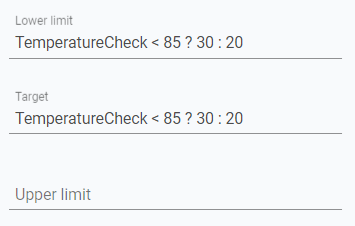
Here is what the operator sees when the temperature is above 85°C
Here is what the operator sees when the temperature drops below 85°C
Hiding the Target
In some scenarios, you may want to hide the Target on the activity form. This is usually to avoid operators entering false data, just to pass the activity.
Expanding from the example above, you may want to hide the amount of cleaning time it should take, so you can capture the amount of time it actually took. To do this, simple go to your activity template and click the Hide target from form tick box.
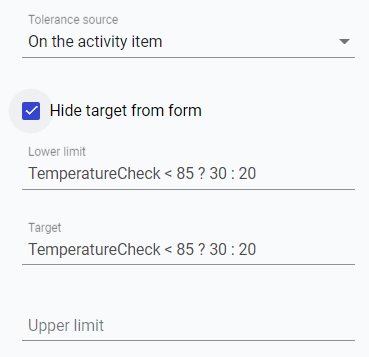
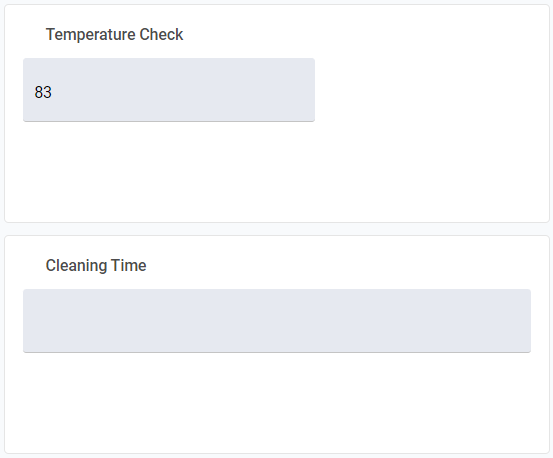
Now, the operator will see the following:
In the example, having a temperature below 85°C means that cleaning time should take 30 minutes (10 minutes longer than standard). If they enter that they took less than 30 minutes, the activity will now fail.
Asset Tolerance
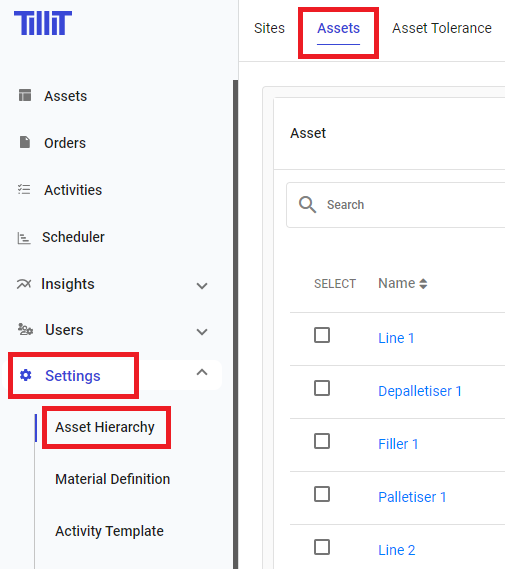
To apply a tolerance to an asset, start by going to Settings > Asset Hierarchy > Assets:
Next, click on the Asset you want to apply a tolerance. In this case, Filler 1. This will open Filler 1's configuration. We need the Asset Tolerance tab:
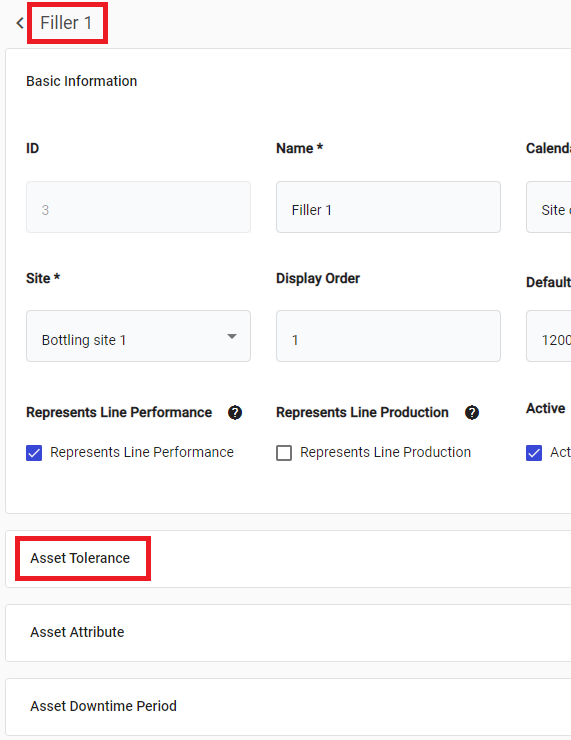
In the Asset Tolerance tab, click Actions > Create:

A pop-up will appear. You must select a Process Variable:
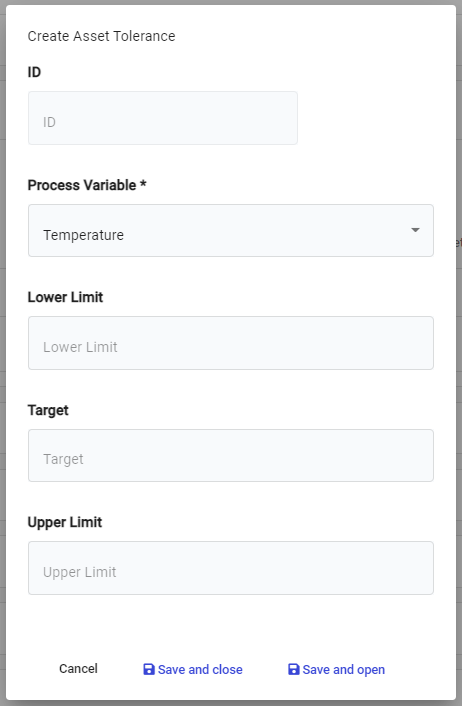
Fill in Lower Limit, Target and Upper Limit, where relevant.
Click Save and close to finalise.

This tolerance will now be defined on all orders that use the Filler 1 asset.
Material Tolerance
Start by going to Settings > Material Definitions > Materials:

Click on the material you wish to apply a tolerance to. In the Material Tolerance tab, click Create:

A pop-up will appear. You must select a Process Variable:

Fill in Lower Limit, Target and Upper Limit, where relevant.
Click Save and close to finalise.
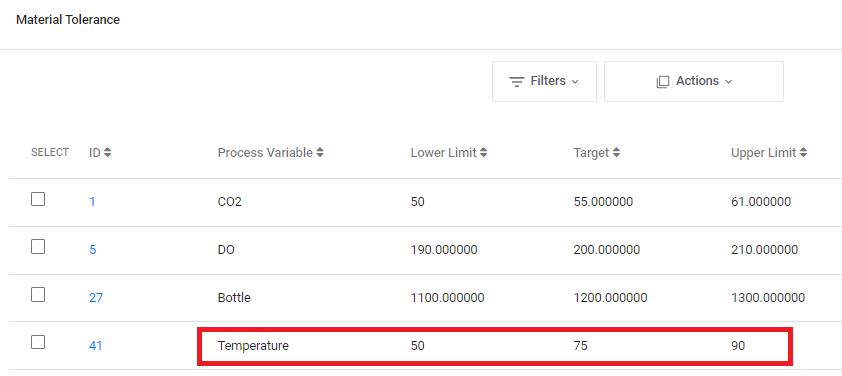
This tolerance will now be defined on all orders that use the 458690 Shiraz v01 material.
Order Tolerance
Some Tolerances may differ per order. If you don't want to use Calculated Tolerances, and you don't want operators to enter it using Update Order Tolerance then the Order Tolerance can be included when you load the order into TilliT, either via the Excel add-inor the API.
Remember to set the Tolerance Source to Order Level for this to work.
Last updated
Was this helpful?