# How to Schedule
The core function of the AI Scheduler is to facilitate optimal operational decision making. The graphical scheduler and optimisation algorithms work together to assist planners to create feasible schedules for publishing to the broader organisation.
See below for a [video introducing](https://video.wixstatic.com/video/890381_22604c1a169148df8432e4c2f910201f/1080p/mp4/file.mp4) the core Scheduling functions of the TilliT AI Scheduler.
## Scheduling Steps
{% hint style="warning" %}
Ensure all Configuration Options are completed including Equipment, Materials, Personnel, Operations, Availability, and you have Orders available for the Scenario.
{% endhint %}
There is a preferred procedure to begin Scheduling:
1. Select Orders from the Orders Store and add to Scenario to populate the Unscheduled Orders grid.
2. Hit Optimise, or start Manually Scheduling via drag and drop.
3. Refine the optimised or manually created Schedule using the range of interactive features of the Scheduling Board.
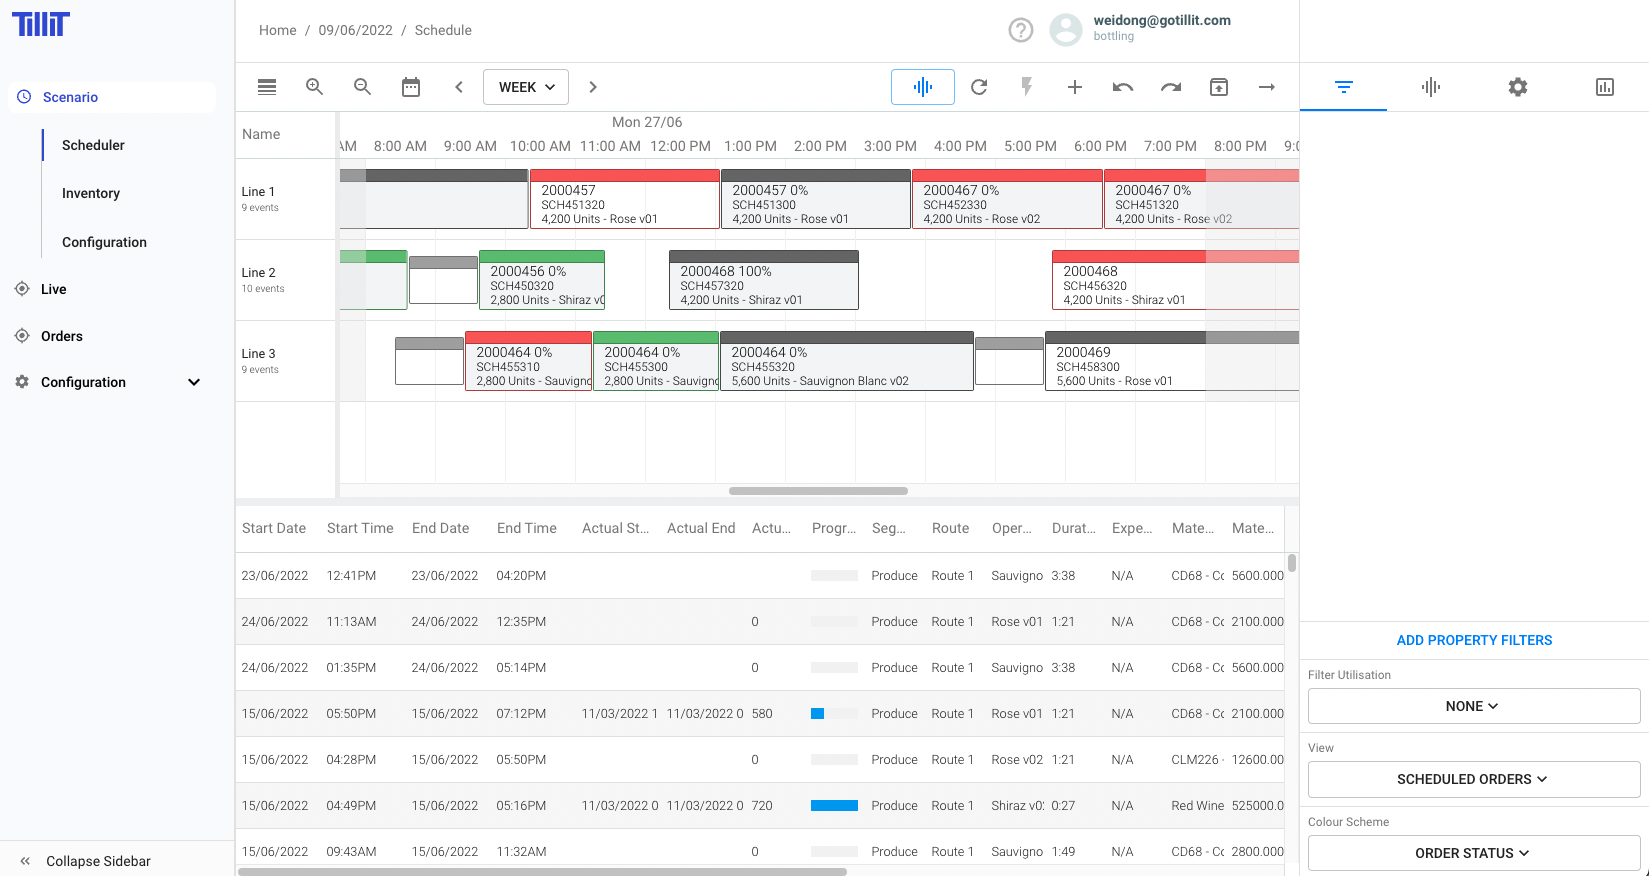
### Interface Overview
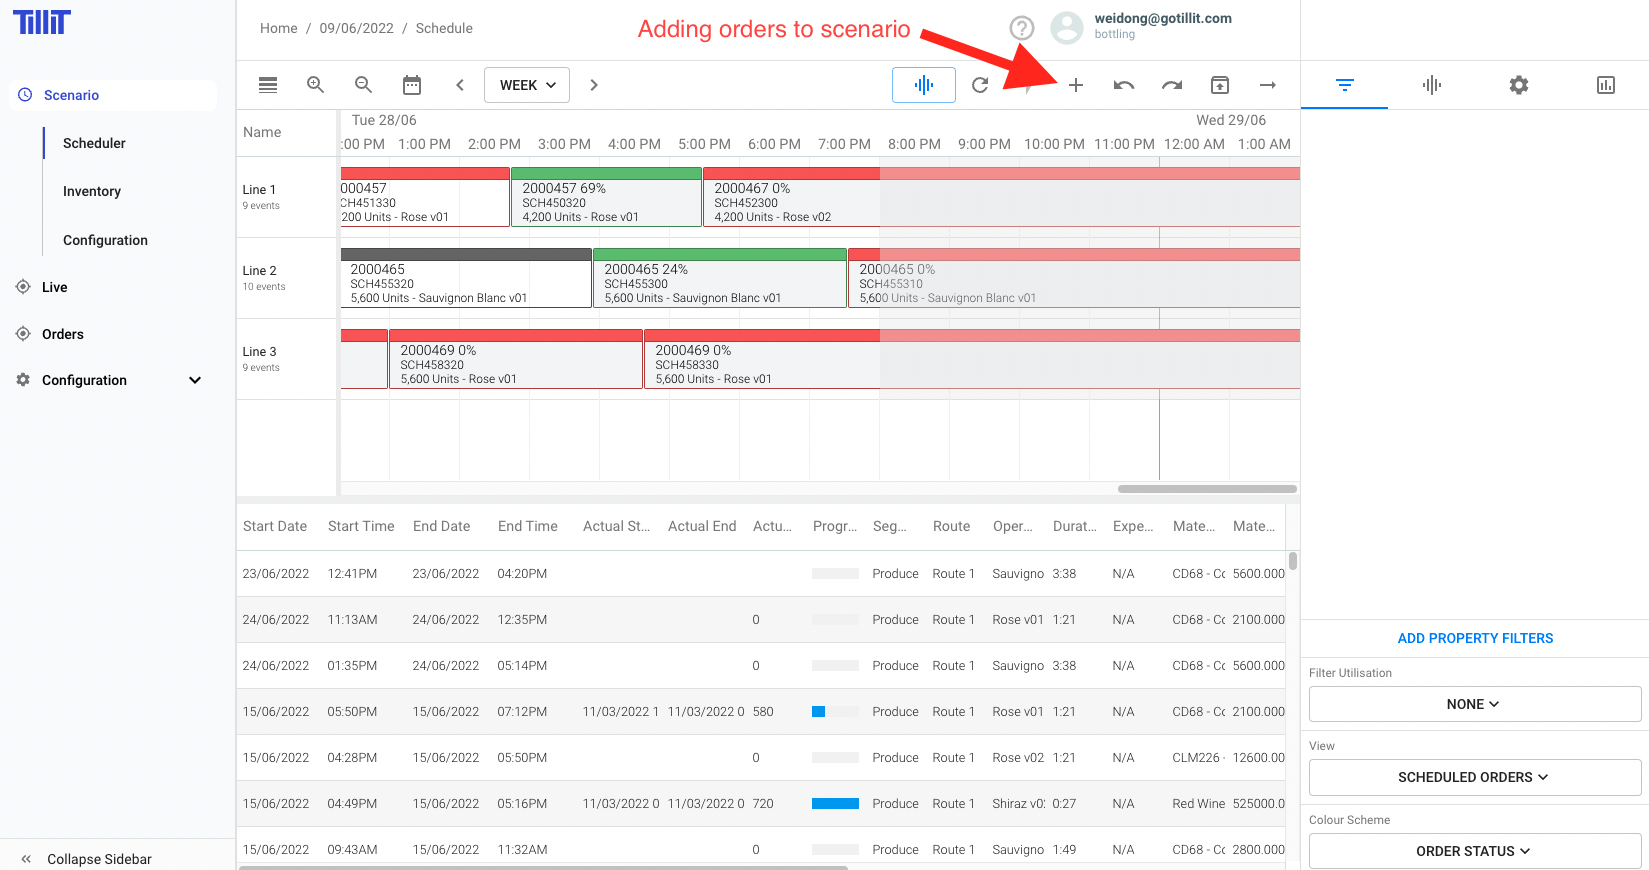
### Adding Orders to a Scenario
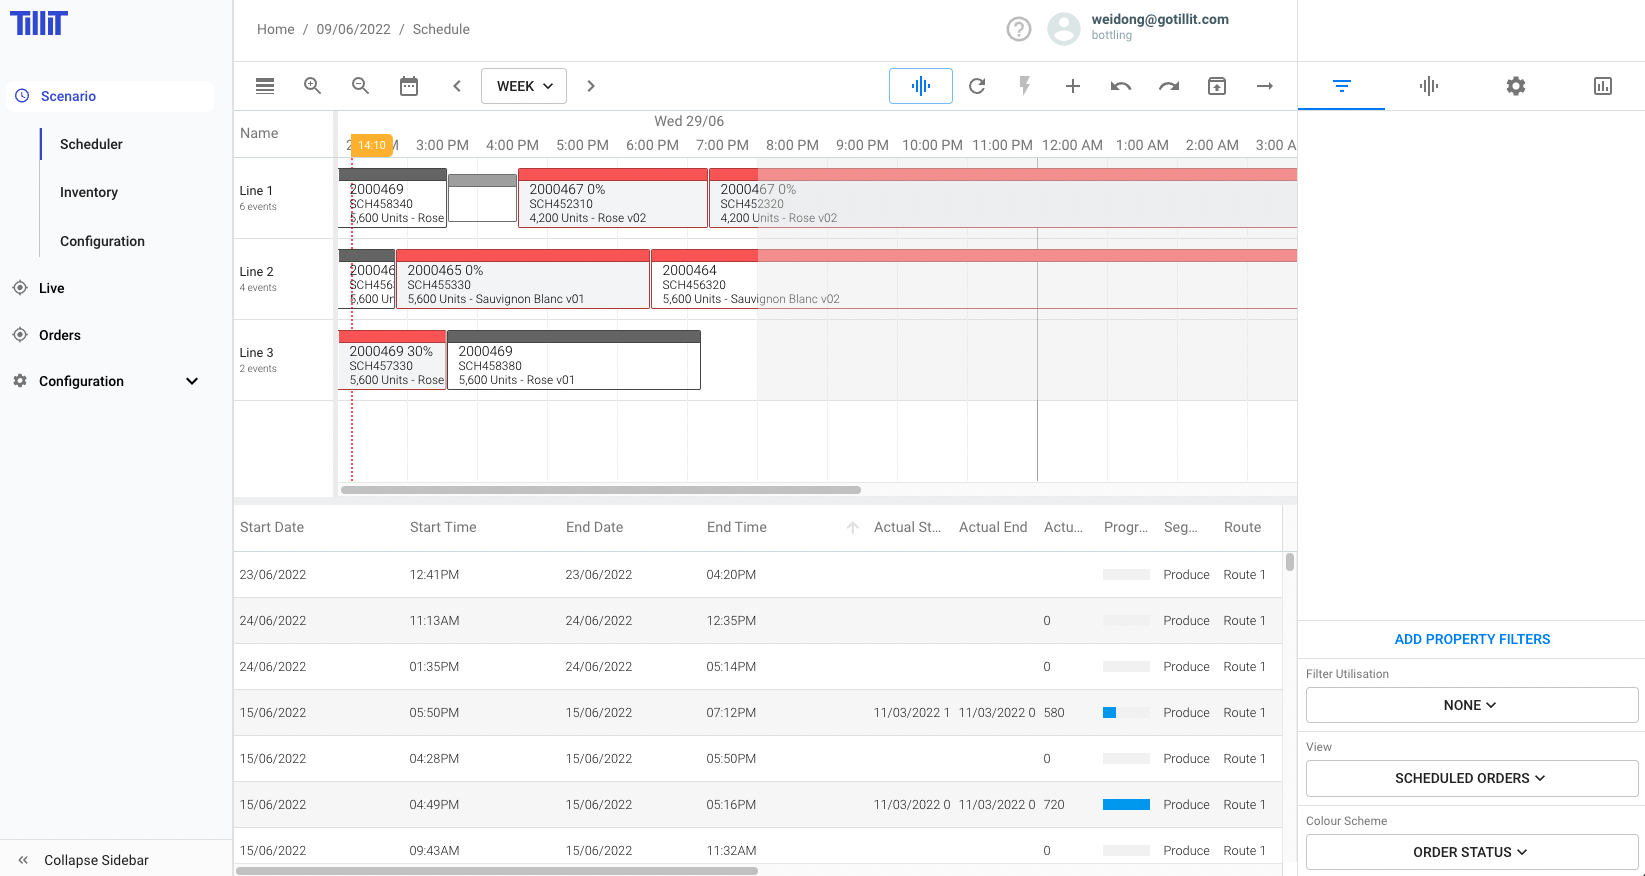
Once a Scenario is Opened, you will be taken to the Scheduling Screen:
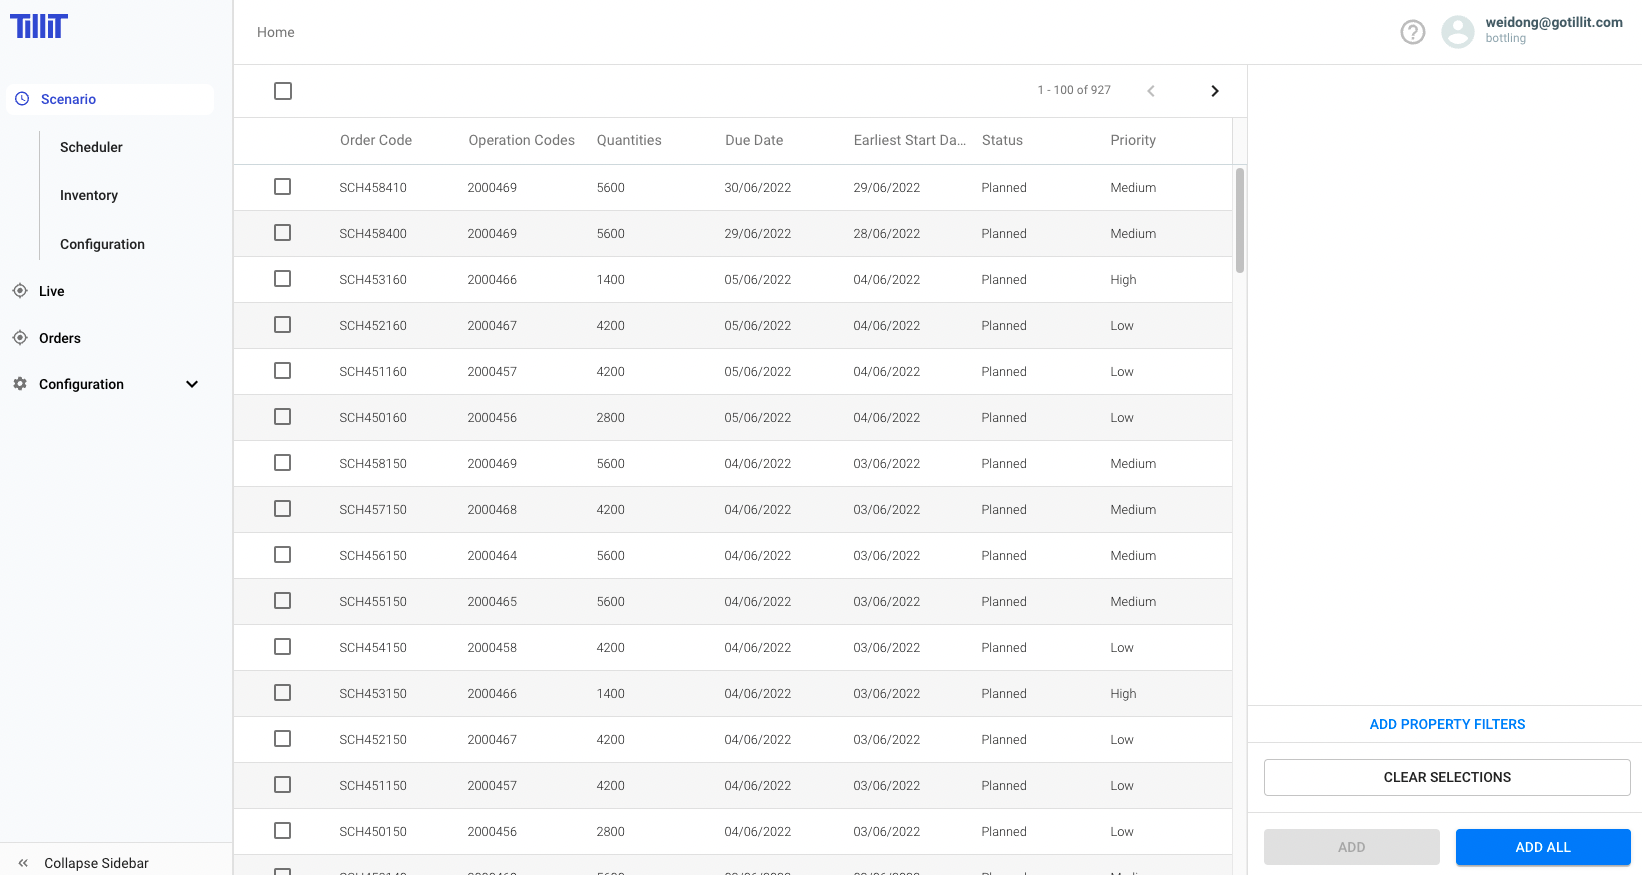
This will take you to the Orders Store where all orders for your Location are managed and updated.
Orders are visible and can be filtered using the Shopping Cart style filtering. Select the Orders you wish to Schedule and hit the Add icon.
{% hint style="warning" %}
Only Orders that have not been added to the Scenario are visible in the Orders Store - so essentially New Orders will be visible here.
{% endhint %}
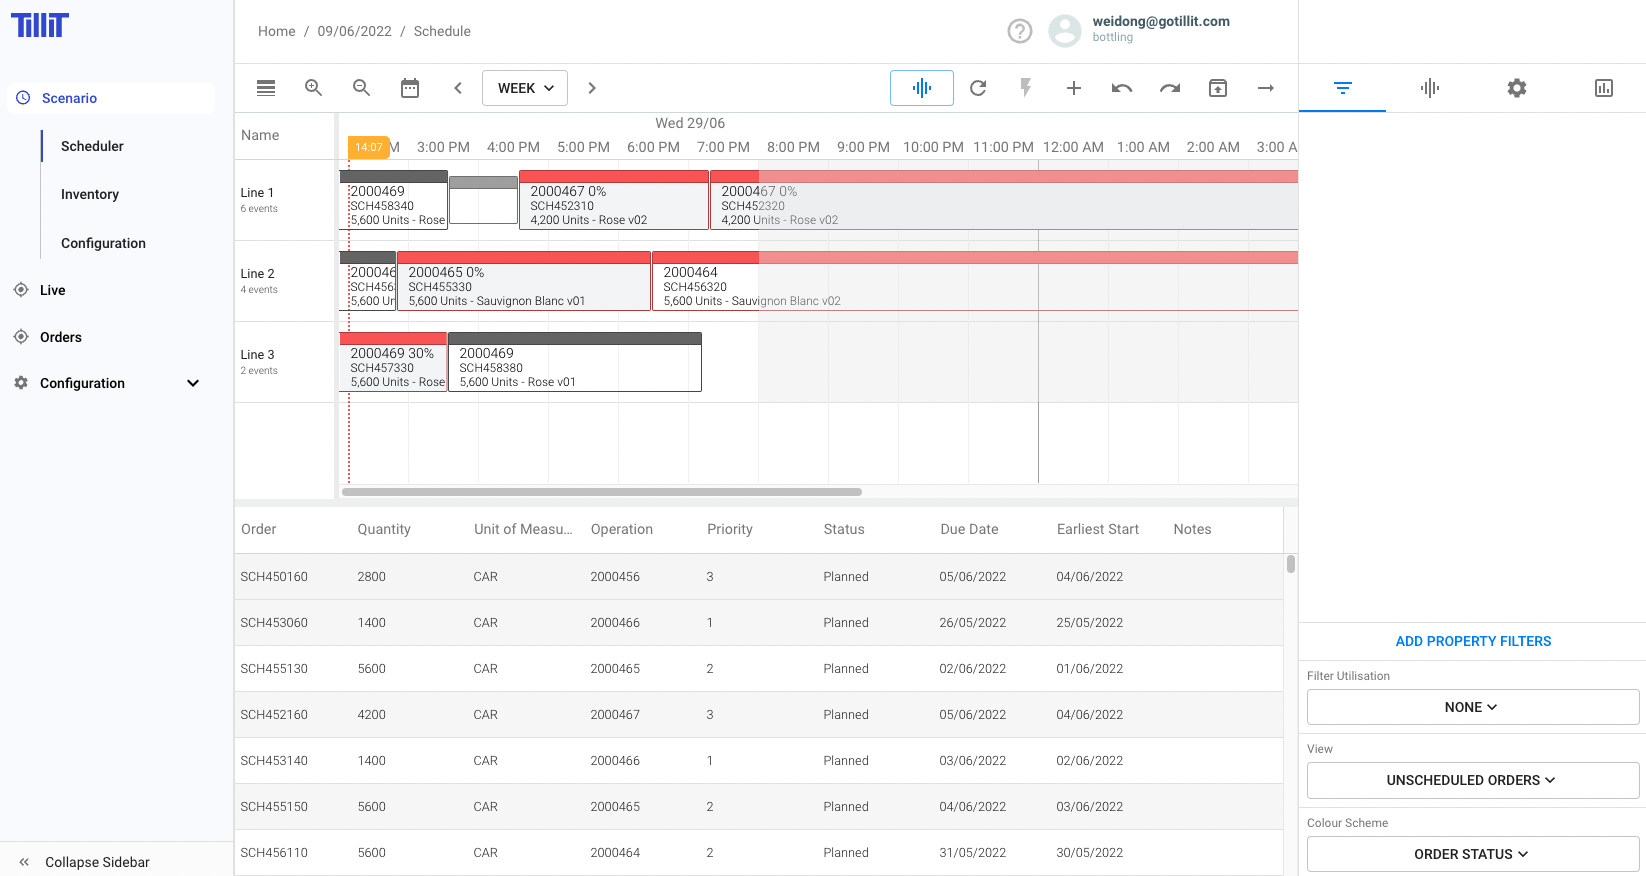
The selected Orders now populate the Unscheduled Orders grid at the bottom of the Scheduling dashboard.
## Manual Scheduling
Drag and drop orders from the Orders Grid onto the Scheduling board. Only Resources that are compatible with that Operation will be highlighted.
Once Orders are Scheduled they appear in the scheduled Orders grid with more detail including detailed start and end time:
### **Scheduler Controls**
| Control/Tip | What it does |
| ------------------------------ | --------------------------------------------------------------------------------------------------------------------------------------------------------------------------------------------------------------------------------------------------------------------------------------- |
| Drag and drop scheduled orders | Move orders forward or backward to any time once they are scheduled |
| Resize orders | Manually adjust order duration by hovering at the edge of a scheduled order and dragging to resize (note: zoom in to daily or hourly level first, as resize function is disabled at long-term zoom levels). Useful when you know an order will take longer than the calculated duration |
| Filters | Limit what is displayed in the Scheduler and Grid (e.g., show only a single machine and its associated orders) |
| Unscheduling orders | Remove orders from the schedule and add them back to the Unscheduled grid |
| Left click on an order | Bring up more detail about the order |
| Double click on an order | Open the Allocations Screen |
## Allocations
Allocation is the process of deciding what resources you want to use when you ave multiple Route Options, and/or a Multi-Step Operation.
Allocations need to be made when manually scheduling complex multi-step operations.
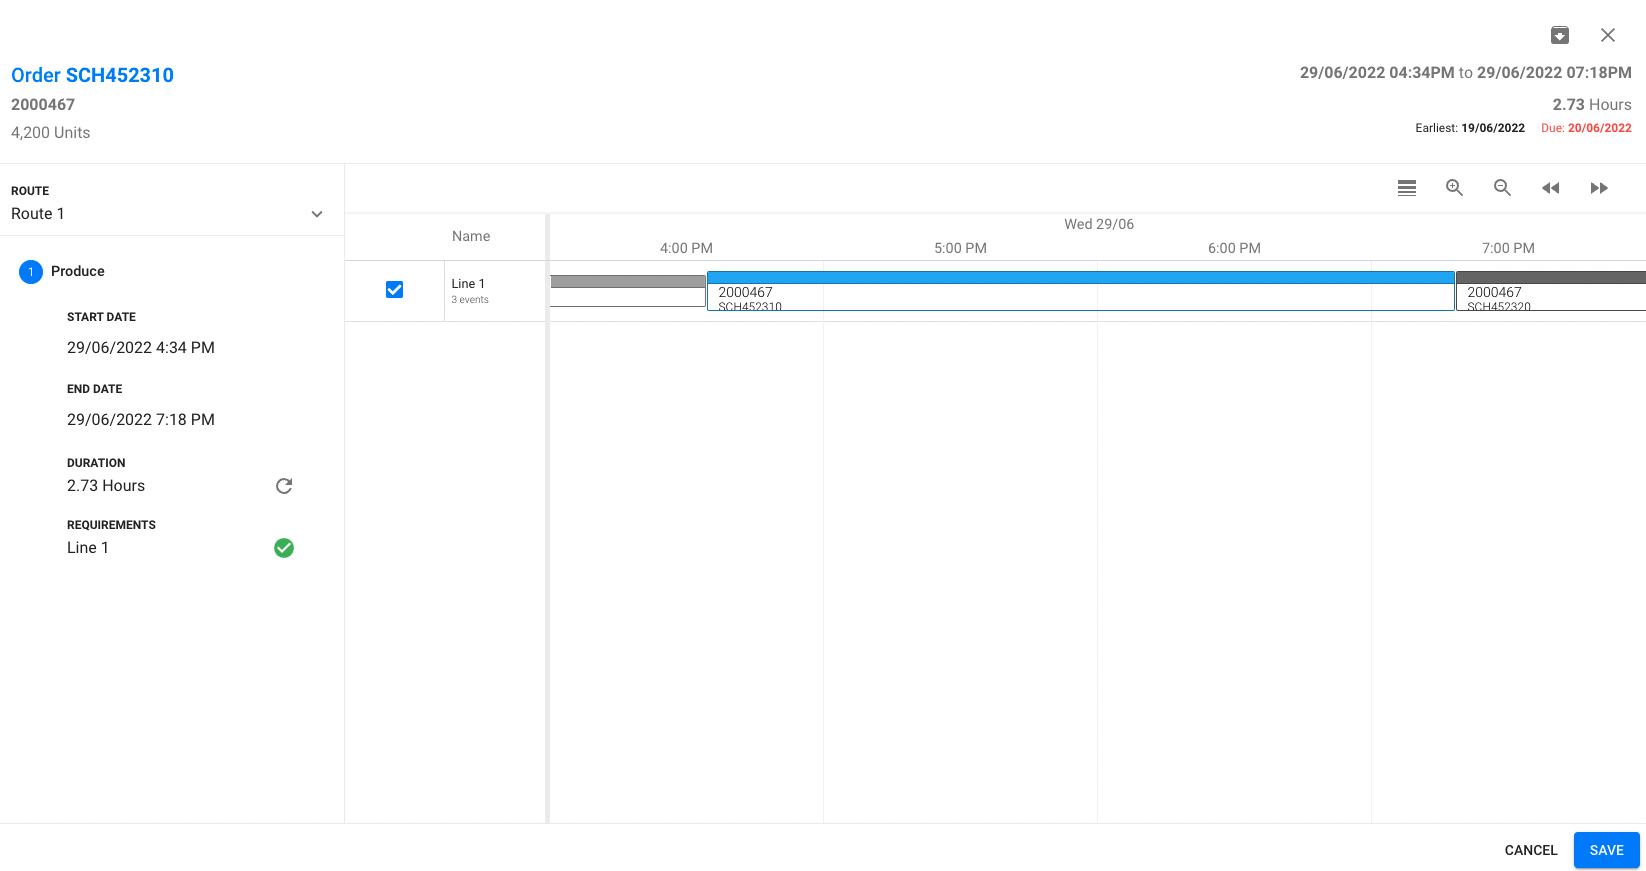
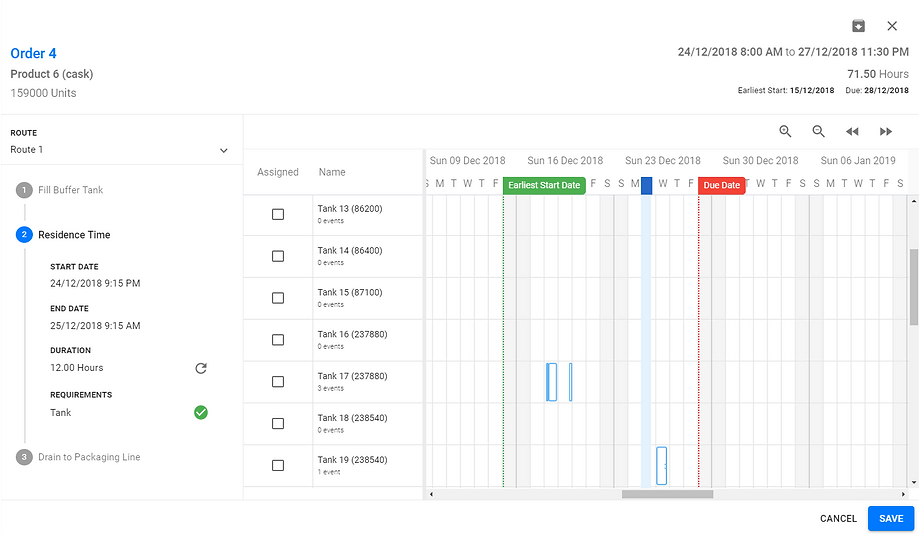
The Allocations screen is a detailed view of Resource Assignment and Route selection:
#### **Allocations Example**
* The example above shows Order 4 for Product 6(159,000 units) with the Earliest Start Date and Due Date visible
* It has 3 steps - Fill Buffer Tank, Residence Time and Drain to Line
* Each step has a Resource Requirement that must be fulfilled
* All available and compatible resources are shown in the timeline
* No resource requirements have been met and all stages of the operation are showing in red
* Above all resource requirements have been met by selecting the required resource for each stage of production.
* You can also see the existing activities where other compatible resources are utilised. This provides visibility of available resources at each stage and time of production.
* Once resource requirements are satisfied the user can save to lock in the schedule.
{% hint style="info" %}
If optimising, the system will automatically Allocate resources according to the most efficient sequence for all Orders.
{% endhint %}
## Optimised Scheduling
For automated Scheduling you can utilise the Optimisation capability in the AI Scheduler. Go to the [Optimisation](/tillit/knowledge-base/scheduler/setting-up-the-scheduler/configuration/optimisation.md) section to understand how to configure the Optimiser Rules.
Optimisation should follow the following process:
1. Import the required Orders into the Scenario
2. Ensure the Optimisation configuration is complete
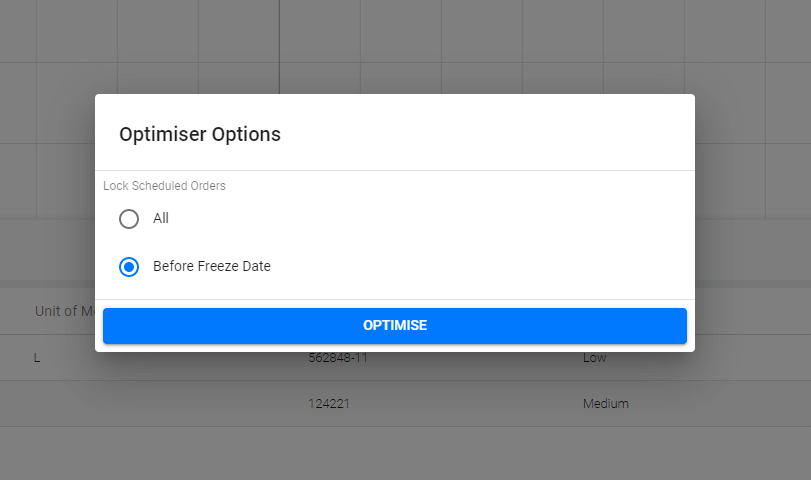
3. Select the Optimise Button in the Scheduler
4. Choose whether to Optimise everything after the Freeze Date, and/or Keep all existing Scheduled Orders Locked (see below for further explanation).
5. The Optimiser will process all orders - thus usually takes between 2 and 10 minutes for very large numbers of orders.
6. Results are displayed once the Optimisation is complete.
7. If there is a problem, the Optimise button will show Red. Please check configuration settings if this occurs.
8. Make manual changes to the Optimised Scenario as required.
#### Frozen and Locked Orders
When selecting to Optimise, the system allows for two modes of Operation:
1. Optimise everything after the freeze date - meaning all orders after this time will be re-optimised including all new unscheduled orders
2. Keep all Locked Orders in place - meaning any order already on the Schedule Screen will stay in place and the Optimiser will allocate only Unscheduled Orders into the Schedule.
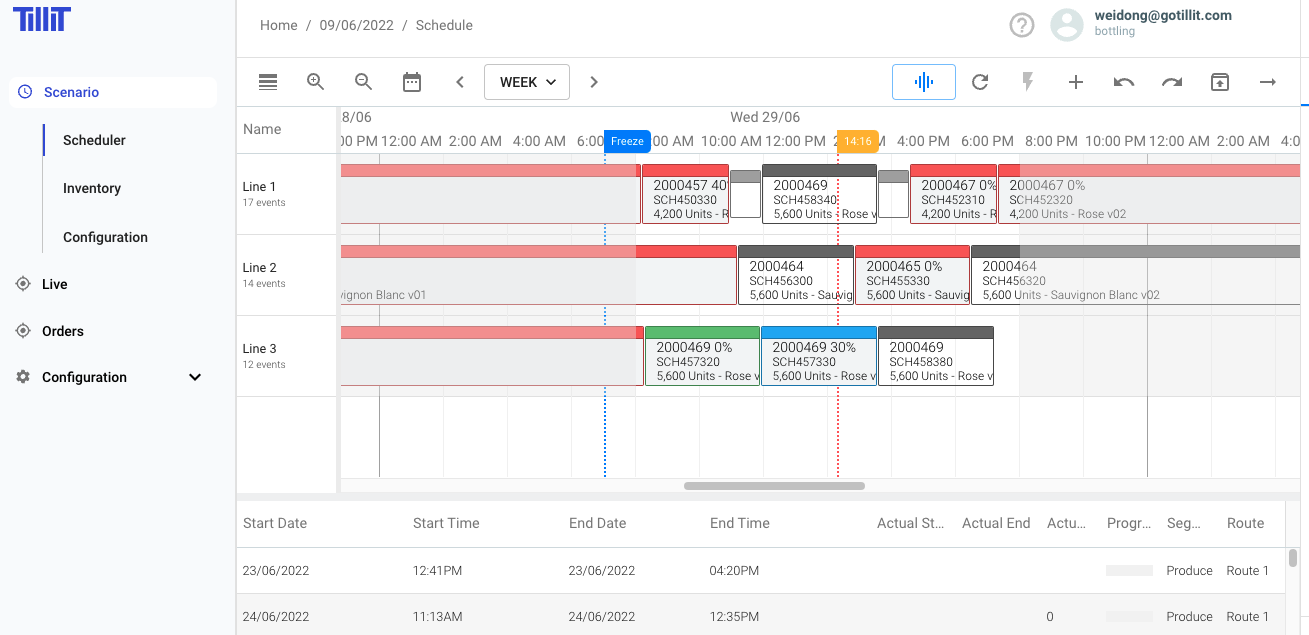
## Freeze Dates
The system allows the user to lock in Scheduled activities by selecting the Freeze date in the Scheduling Dashboard.
After selecting a freeze date by clicking holding and dragging the Freeze line in the Scheduler, all orders scheduled prior to this time cannot be changed and will not be rescheduled when Optimising. All Orders that are unscheduled or are scheduled but after the freeze date/time will be Optimised when the Optimisation button is elected.
{% hint style="info" %}
The Optimiser will use the Freeze Date/Time as the starting point for allocating new orders into the Schedule. If there are orders already scheduled that cross/intersect the Freeze Date, the Optimiser will append the new order to the previous order including any changeover calculations that may be required.
{% endhint %}
## Comparing scheduled and actual orders
It is possible to compare the scheduled orders and orders that are actually being executed by using the "Actuals" option in the "View" drop down list to the right side of the scheduler:

## Order Dependency
When an operation is selected on the Gantt timeline, dependency arrows are displayed to show the relationships between linked operations.
Arrow styles differ by dependency type:
* **Solid line** — segment-level and order-level dependencies
* **Dashed line** — material dependencies
### Order Dependency Toggle
The ***Order Dependency*** toggle in the Scheduler Settings drawer controls which dependency arrows are displayed:
| Toggle State | Arrows Shown |
| ------------- | -------------------------------------- |
| OFF (default) | Segment and material dependency arrows |
| ON | Segment and order dependency arrows |
Toggling the setting while an operation is selected immediately refreshes the arrows on the timeline.
{% hint style="info" %}
The Order Dependency toggle is saved per browser session and defaults to OFF.
{% endhint %}
---
# Agent Instructions: Querying This Documentation
If you need additional information that is not directly available in this page, you can query the documentation dynamically by asking a question.
Perform an HTTP GET request on the current page URL with the `ask` query parameter:
```
GET https://help.tillit.cloud/tillit/knowledge-base/scheduler/scheduling/scheduling.md?ask=
```
The question should be specific, self-contained, and written in natural language.
The response will contain a direct answer to the question and relevant excerpts and sources from the documentation.
Use this mechanism when the answer is not explicitly present in the current page, you need clarification or additional context, or you want to retrieve related documentation sections.