Creating a Shift Template
Overview
Some activities will need to be triggered at the start and end of your staff shift patterns. To accommodate this, TilliT has the ability to create shift templates, which will define when the start and end of shift events are triggered.
Creating Shift Patterns in TilliT is a two-step process: Shift Template, then Shift Calendar. First, we create a Shift Template.
Creating a Shift Template
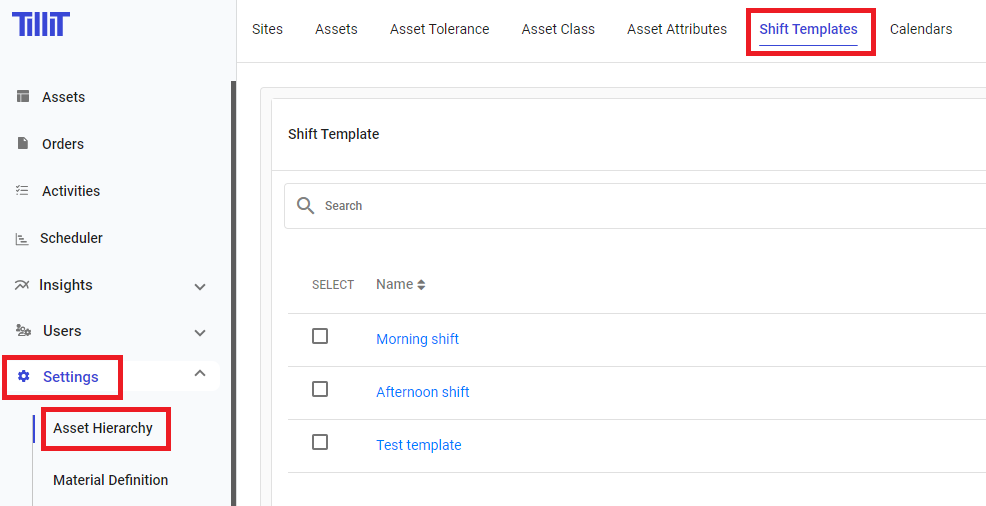
To create a Shift Template, go to Settings > Asset Hierarchy > Shift Templates:
Click Actions > Create. You will be presented with a pop-up:

Give the Shift Template a Name; Description is optional. You can leave Workers empty or enter a number.
Click Save and open.
Creating Shift Template Items
Now we need to create a Shift Template Item. Click Actions > Create:
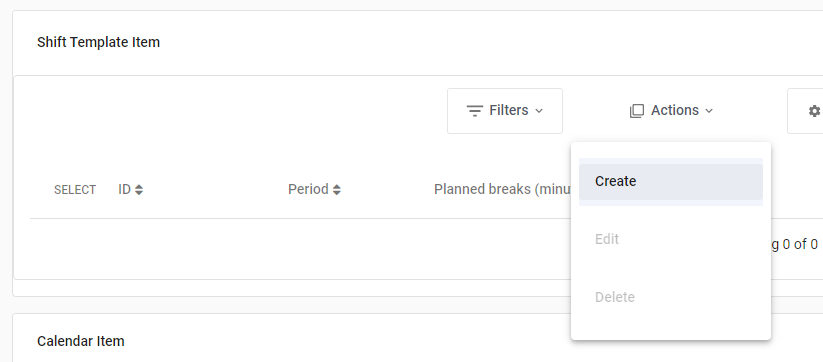
You will be presented with a pop-up
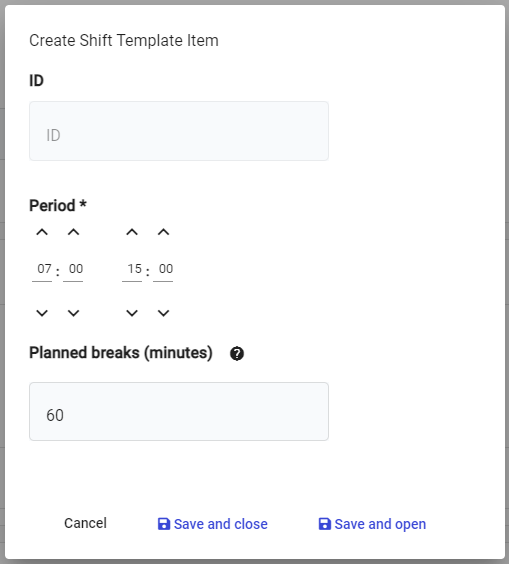
Set the Period you wish to add to the morning shift. The Planned breaks field is optional (details below).
Click Save and close.
If you know that there will be break, but it isn't at a set time, you can add this in the Planned breaks field.
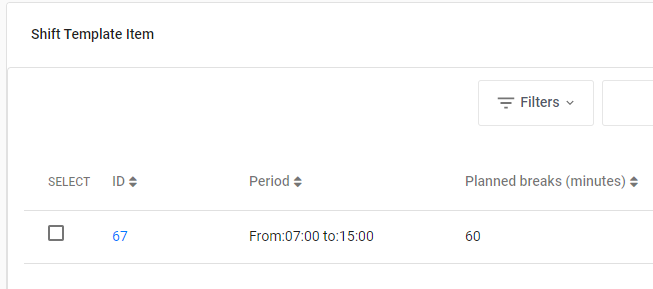
If you know when the break(s) will be, it is better to create two or more Shift Template Items that define the working period around those breaks:
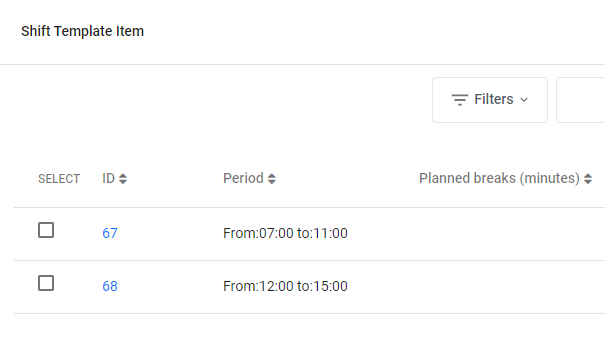
Note that the Planned breaks field is left empty in this case, as we have defined the break as between 11:00 and 12:00.
Whether using multiple Shift Template Items or the Planned breaks field, break time is considered when tracking OEE in TilliT.
Once you've set the Shift Templates, you can now apply them to Calendars.
Creating a Shift Calendar
To create a Shift Template, go to Settings > Asset Hierarchy > Calendars.
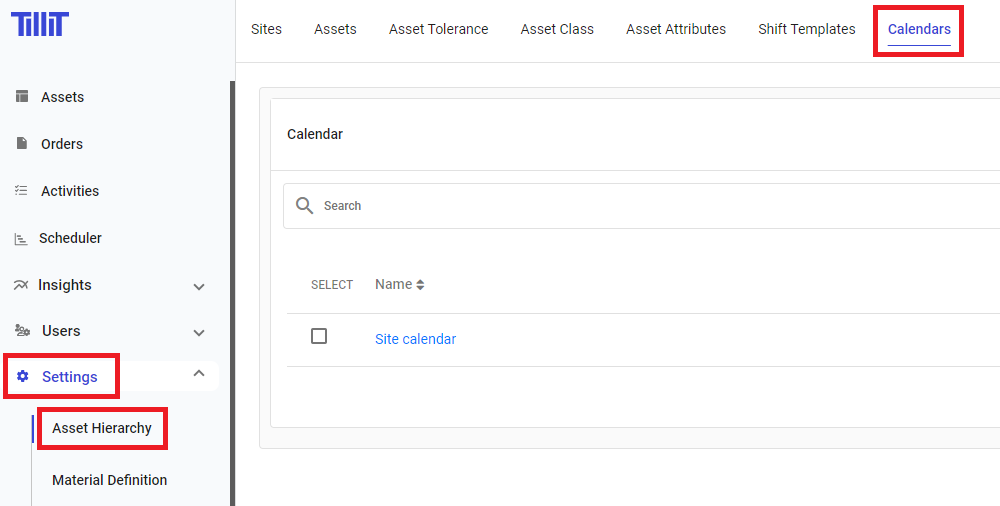
Click Actions > Create. You will be presented with a pop-up:
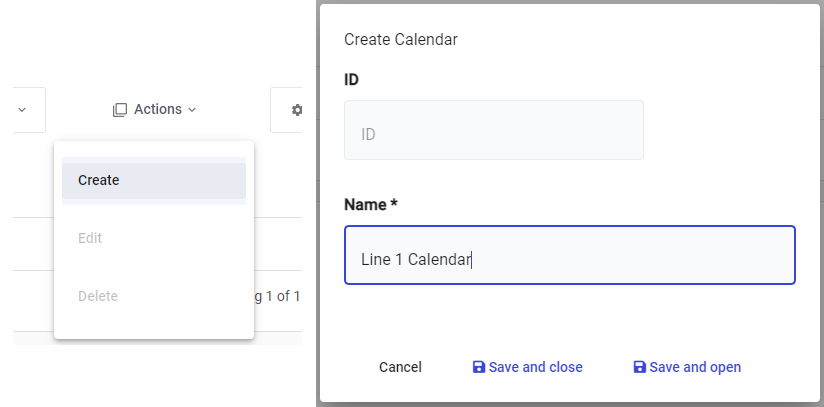
Give your calendar a Name, then click Save and open.
Next, you need to create a Calendar Item. Click Actions > Create:
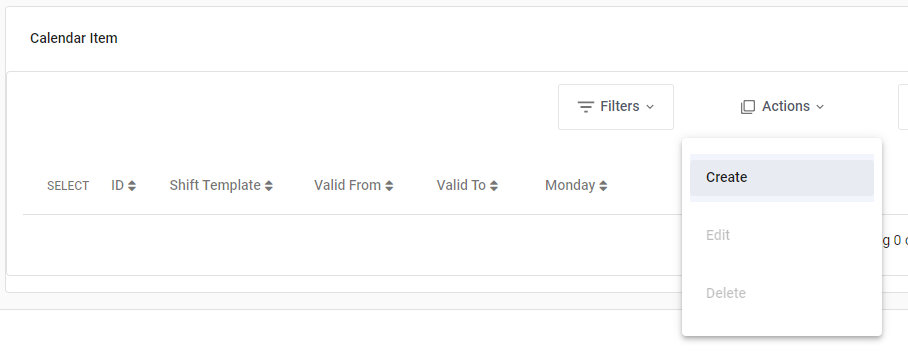
You will be presented with a pop-up:
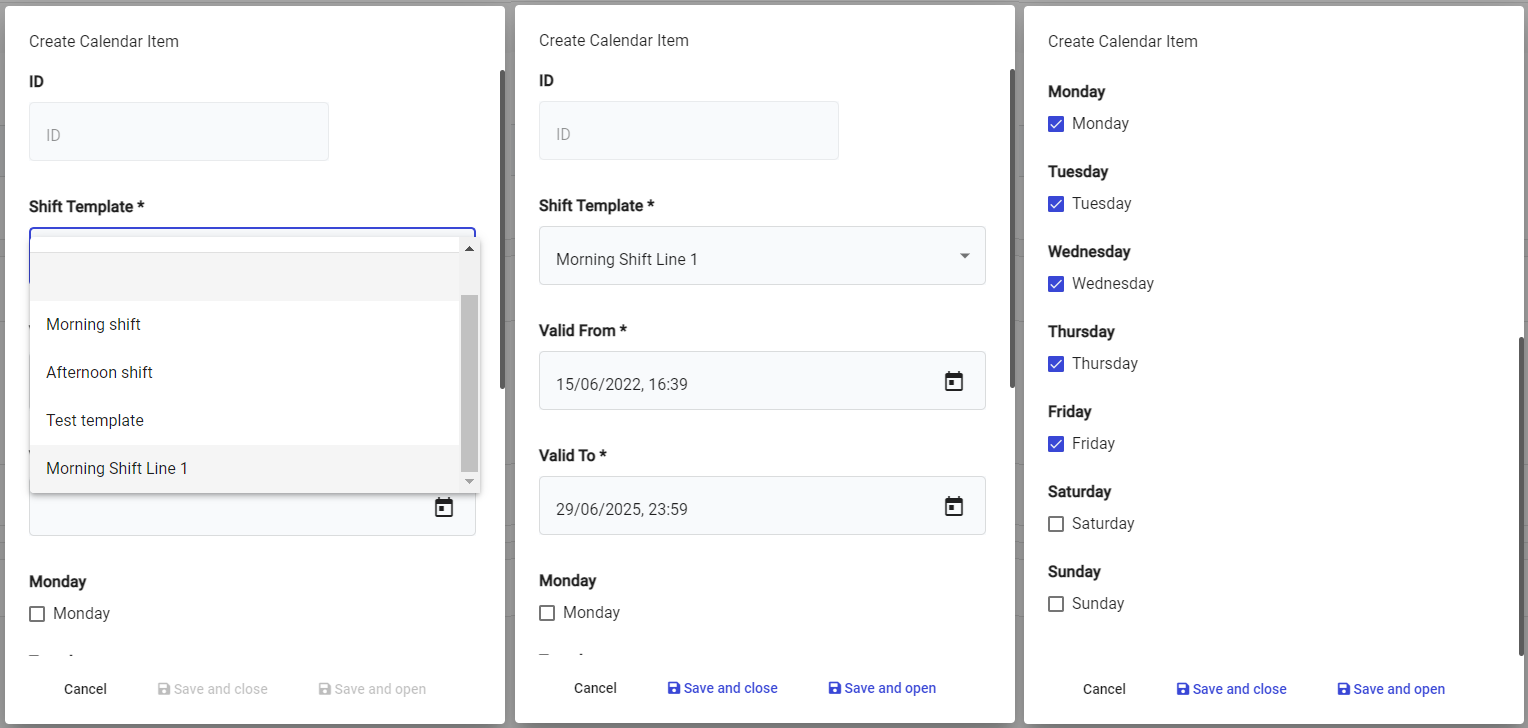
First, you need to select the Shift Template you created earlier from the drop-down list.
Next, you need to select your Valid From and Valid To dates. This sets the period in which the Calendar operates, allowing you to have shift patterns that only operate during specifically-defined dates (e.g. Winter vs Summer shift patterns). If you don't wish for the shift pattern to expire, set a far-off date in the Valid To field.
Finally, select the days in which the shift pattern pertains to.
Click Save and close.

Add Calendar to Asset
To make use of you shift patterns, you need to assign your calendar to the desired asset.
Go to Settings > Asset Hierarchy > Assets:
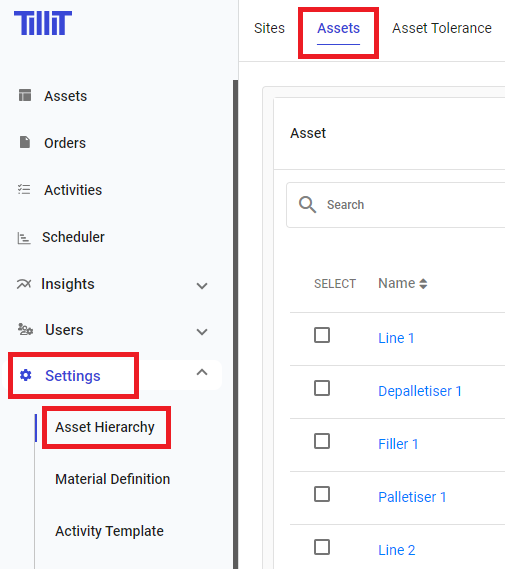
Click on the Name of the asset you wish to add a Calendar to, then click on the Calendar drop-down:
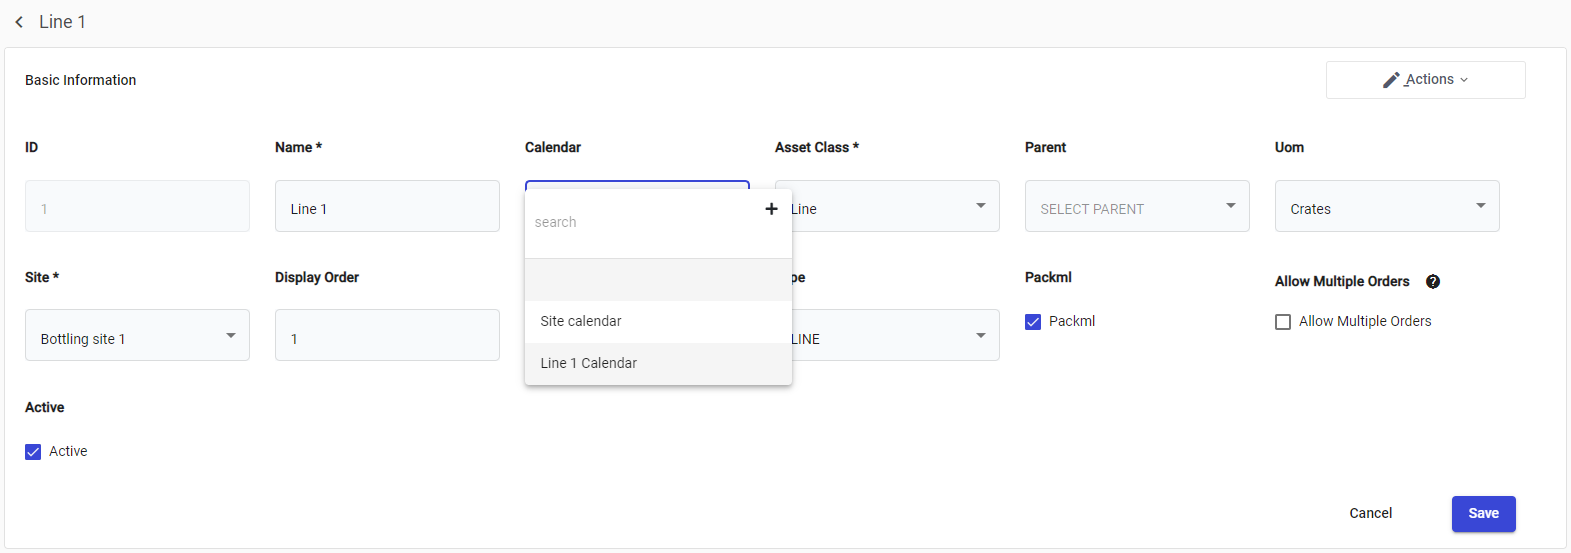
Click on the Calendar you made earlier, then click Save.
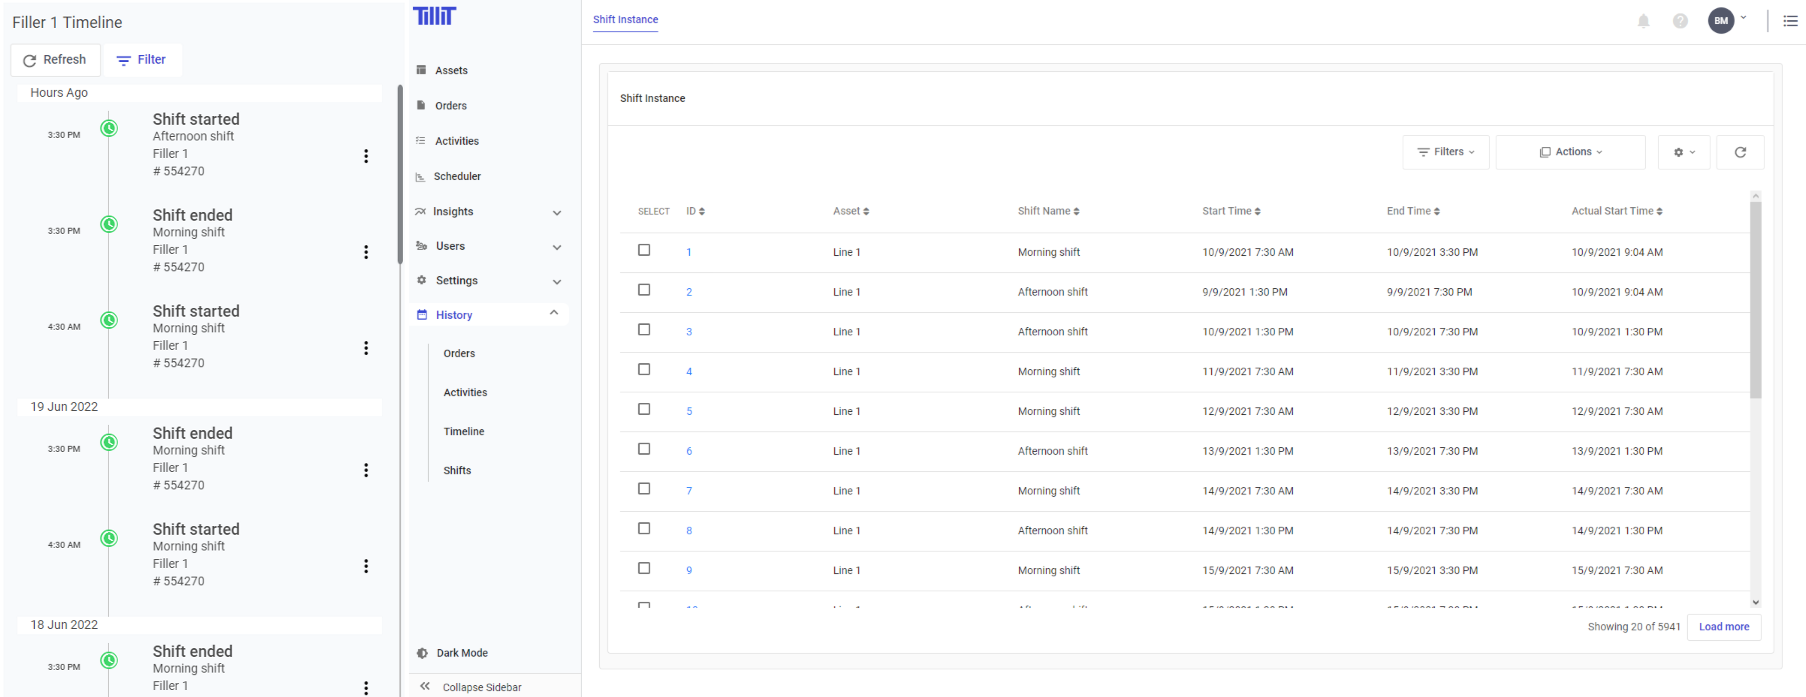
You can now use Shift Started and Shift Ended triggers for activities in the When clause.
Confirm that the above setup has worked by seeing your shift events occuring at the specified time on the event timeline and a shift instance has been created
Adding the number of workers
For existing Shift Templates, add this number in their Basic Information panel

Last updated
Was this helpful?