TilliT
HomepageChangelogDeveloper
  • Home
  • Introduction to TilliT
    • Introduction for New TilliT Customers
    • Videos
  • Getting Started
    • Overview
    • Definitions
    • Set up a Site & Assets
    • Set up an Activity
    • Create an Order
    • Start an Order
    • Next steps
  • Planning
    • Overview
    • Data Gathering
      • Site & Assets
      • Production Orders
      • Activities
      • Shifts & Calendars
      • Materials
      • Process Variables
      • Attributes
      • Articles
      • Checklist
  • Knowledge Base
    • Everyday Usage
      • Layout Overview
      • Login to TilliT
      • Basic functionality
      • Lock screen
      • Pinning Assets
      • Switch Site
      • Next Steps
      • Activities
        • Claiming
        • Completing
        • Manually starting
      • Orders
        • Create adhoc Order
      • Events
        • Raising an Event Using the UI
      • Notifications
    • Scheduler
      • Introduction
      • Feature Overview
      • Scheduler to Digital Operations integration
      • Scheduling
        • Scheduling
        • Orders
        • Scenarios
        • Inventory
      • Configuration
        • Operations
        • Equipment
        • Personnel
        • Materials
        • Availability
        • Optimisation
        • Changeovers
        • Loading data with excel Add-in
      • MVP Setup Guide
    • Insights
      • Activity report
      • Production Report
      • Dashboards
      • Advanced Analytics
        • Sharing dashboard
    • Users
      • User
        • User Confirmation
        • User channels
        • User subscriptions
      • Groups
      • Permissions
      • User authentication with SSO
    • Boards
    • Settings
      • Asset Hierarchy
        • Site
        • Asset
          • Asset Attributes
          • Asset Tolerances
          • Downtime periods
          • Attribute Group
          • Edge data tags
        • Asset class
        • Order Templates
          • Order Template with Unit Conversion
        • Calendar
          • Calendar item
        • Shifts Templates
          • Creating Shift Templates
          • Manual shift patterns
        • Asset Meter
      • Material Definition
        • Material
        • Material group
        • Material attributes
          • Example of material attributes
        • Material tolerance
          • Example of Material tolerance
        • Material component
        • Material conversion
      • Activity Templates
        • Activity template
          • Creating an activity
          • Where
          • When
          • Versioning
          • Building
          • Elements
            • Item types
              • Item properties
                • Active item & hidden expressions
                • Hint
                • Tolerance Source
              • Update Attribute
              • Board Item
              • Raise event
            • Data Types
              • Evaluate Data types & Dynamic Note
              • Note
              • Option list
              • Dynamic option list
              • Barcode
              • GS1 Barcode Scanner
              • Edge data
              • Material Component
              • Image capture
              • Sections
              • Digital Signature
              • Material
              • Dynamic Form Items
              • Inventory Key
        • Activity class
      • Events
        • Event Type
        • Event Relay
        • Event Schedule
      • Articles
      • Integrations
        • Adding Webhook Subscriptions
        • MQTT Integration
        • Receive the TilliT Event
        • Notifications
      • Configuration
        • Attribute
        • Attribute group
        • Tolerances
        • Dashboard group
        • Report Templates
          • Creating and Using Report Templates
        • Process variable
        • Unit of Measure
        • Run Rate Template
      • Translation
      • Audit Log
    • Edge
      • Introduction
      • Before You Start
        • Security / Firewall
        • TilliT Edge
        • Understanding your Networks
        • Common Installation Solutions
        • Managing and Publishing changes
      • Physical Device
        • Setup
      • Using Docker
        • Upgrading a docker container from before 2025
      • Common Data Sources
        • OPC-UA
        • Modbus TCP
        • Ethernet IP
        • Profinet
        • RTLE
        • Simulator
      • Data Tags
        • Data Tag Templates
        • Order Number Tag Template
        • Edge Data Tag Options
      • Edge Triggers
      • TilliT Sensors
        • Connect TilliT Edge to a Wireless Gateway
        • Bind a Wireless Counter to a Wireless Gateway
        • Configure FEN-20 PNP Sensor
      • Troubleshooting
      • Windows Edge Installer
    • History
    • OEE
      • Two Steps to Availability
      • Two Steps to Performance
      • A Step to Quality
    • Track and Trace
      • Before you begin
      • Transaction Types
      • Movement Types
      • Movement Types Field
      • Adding Material Movement to an Activity Template
      • Completing the Activity
      • Reporting
    • Mobile View
      • Device shortcut
      • Unable to enter Negative Numbers
    • Importing, Exporting and Cloning Entities
    • Troubleshooting
  • Tools
    • Excel add-in
      • How to Install the Excel Add-in
        • Excel Online
        • Desktop
      • How to Update the Excel Add-in
      • Loading multiple orders
      • Maintaining Master Data in Bulk
      • Downloading Time-Series Data
    • Staging Environment
    • Ignition Module
      • Installation
      • TilliT Tag Provider
        • Data From TilliT to Ignition
        • Data From Ignition To TilliT
      • Scripting Using the TilliT Module
      • Network Security
  • INFRASTRUCTURE
    • FAQ
    • Architecture
    • Disaster Recovery
    • Software Quality Assurance
Powered by GitBook
On this page
  1. Knowledge Base
  2. Edge

Using Docker

Use Docker to configure Edge

PreviousSetupNextUpgrading a docker container from before 2025

Last updated 4 months ago

Upgrading a Docker Container from before 2025?

Before 2025, upgrading the Tillit Edge Docker required destroying the existing container, which led to missing files necessary for the new version. Starting in 2025, this issue has been resolved, and upgrades can now be performed without losing critical files.

Take a look at this guide to get more information - Upgrading a docker container from before 2025

A Docker Desktop installation allows you to install the TilliT Edge software on a virtual machine or remote desktop, simplifying the process by eliminating the need to install a physical device in the automation area. Setting up Docker requires basic knowledge of the command line interface and Linux systems, but our support team is available to assist you if needed.

  1. Navigate to the Edge Screen:

    • Go to Settings > Edge

  2. Create a Docker Edge Device:

    • From the drop-down menu, select SELF_MANAGED_DOCKER. You can choose any name for the device.

    • Click Save and then Open. This may take a few seconds to complete.

  3. Download the Edge Docker Files:

    • Once your edge device is successfully created, you will be taken to a new screen.

    • In the top right corner of the toolbar, click the Get Resources button to download the Docker files for your edge device.

  4. Extract the Docker Files:

    • Locate the folder where the files were downloaded.

    • Extract the contents, and then open the README.md file. This file provides instructions on how to install Docker and Docker Compose if you haven't already done so.

  5. Run the Docker Setup:

    • Open a terminal window in the folder where the files were extracted.

    • Run the following command to start the Docker container:

      docker compose up --detach --no-recreate
    • Docker will start downloading the edge software from Docker Hub. Once completed, the container will start automatically.

  6. Wait for the Device Setup to Complete:

    • Allow the device to run for about 5 minutes while it finishes the setup process.

    • After this time, return to the TilliT interface and check that your edge device is now marked as Online.
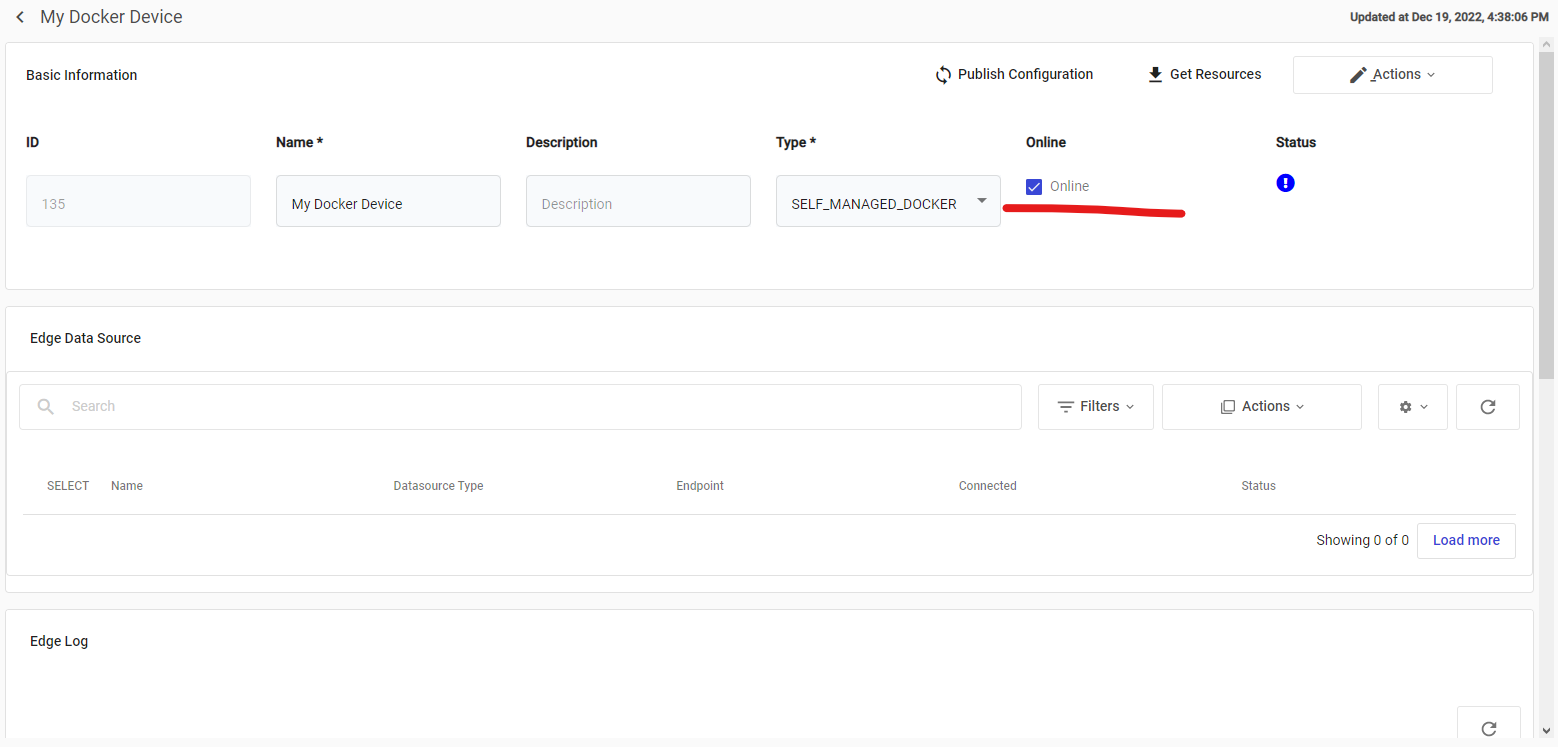
    At this point, you can configure your edge device just like you would with a physical device.