> For the complete documentation index, see [llms.txt](https://help.tillit.cloud/tillit/llms.txt). Markdown versions of documentation pages are available by appending `.md` to page URLs; this page is available as [Markdown](https://help.tillit.cloud/tillit/knowledge-base/setting-up-tillit/articles/managing-articles.md).
# Managing Articles
## Create an Article
#### In Tree View
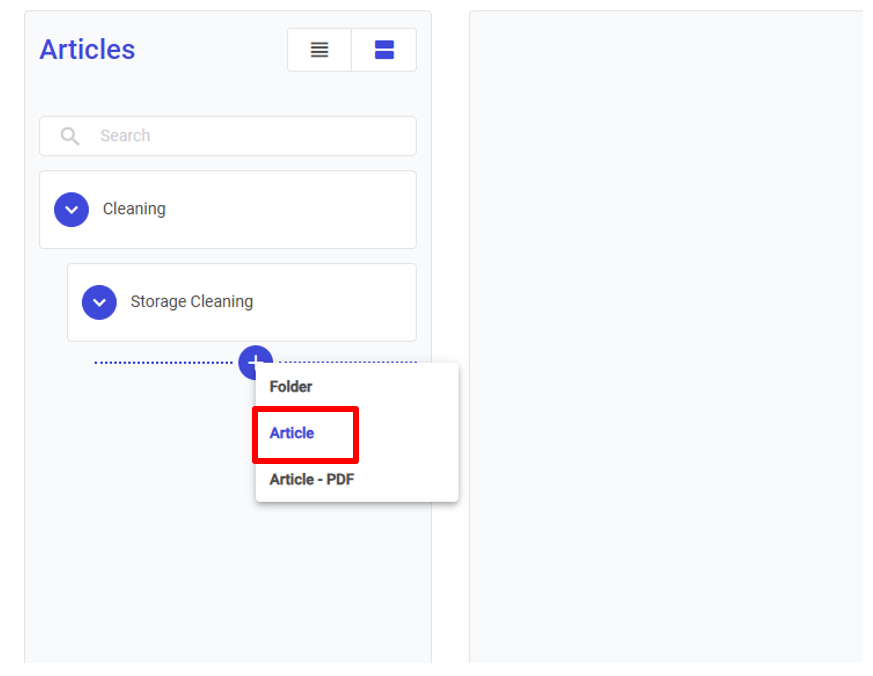
Click on the **+** (plus) sign and choose Article to open the editor.
#### In Table View
Click on the **+ Create** button and choose Article to open the editor.
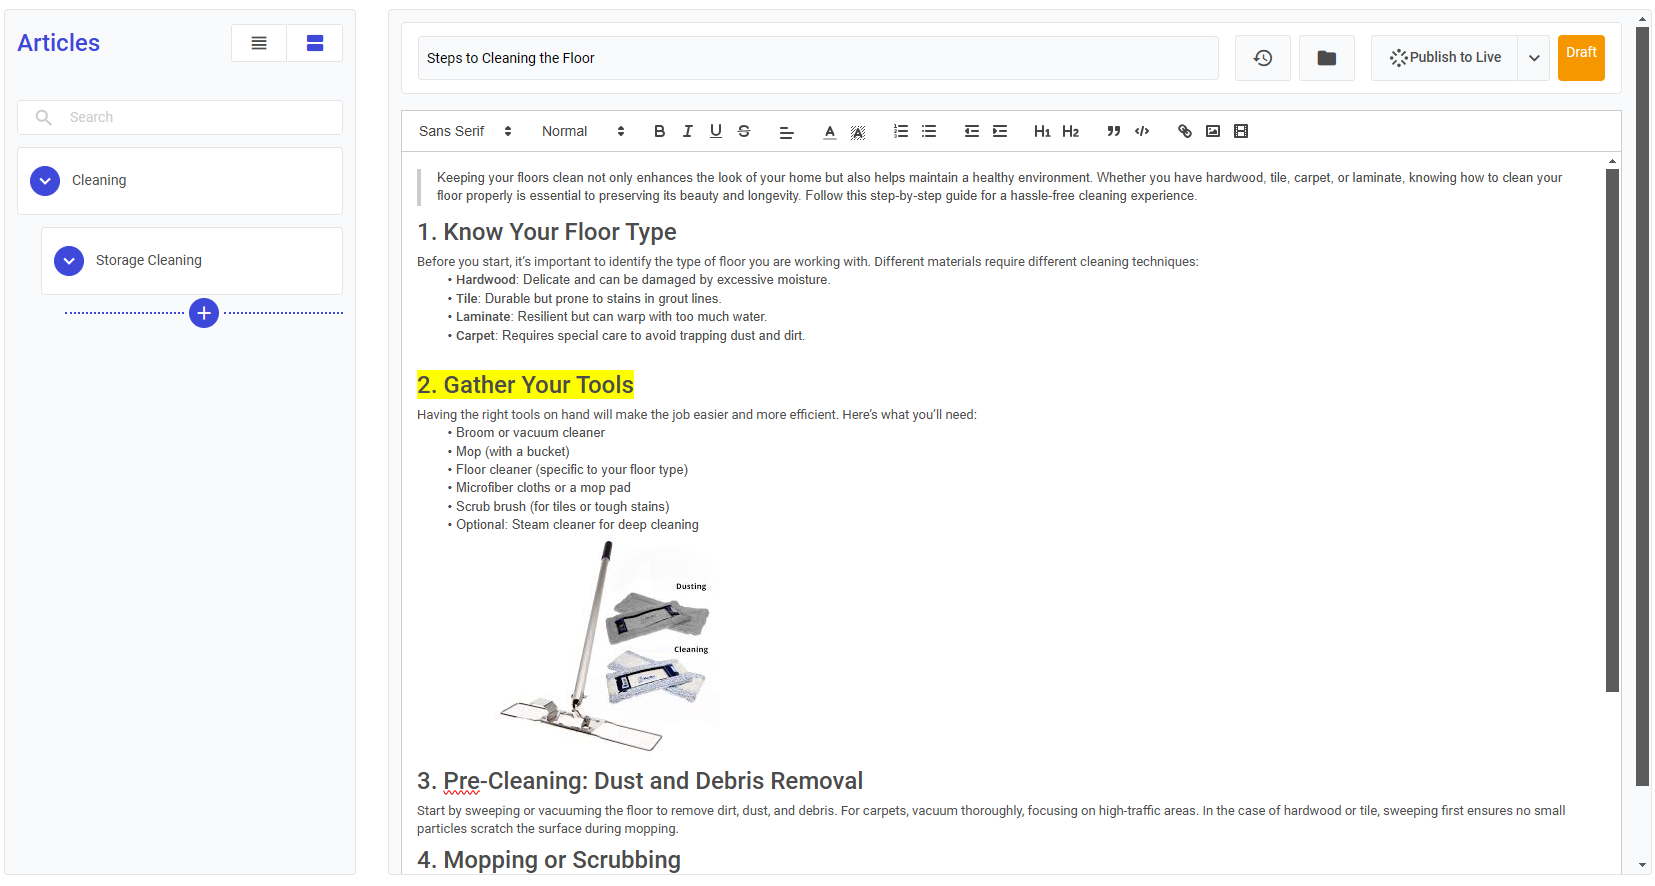
With the online editor, users can easily modify the content of their articles, including the text itself and the way it's presented.
You can either start from scratch or copy existing SOPs or articles that you already have. There are no restrictions on using pre-existing content to create new articles. Write your articles in anyway that maximize their comprehension and usability.
### Editing your Article
Once your article is created, you can structure and format your content using the rich text toolbar at the top of the editor. This toolbar allows you to style your text, add visual elements, and organize your information effectively:
* **Text Formatting:** Customize your content using the various typography options, such as font families, font sizes, text colors, and highlighting.
* **Structure & Headers:** Apply heading styles (such as H₁ and H₂) to create clear sections, and use bulleted or numbered lists to improve readability.
* **Media & Elements:** Insert images, videos, hyperlinks, tables, or code blocks to ilustrate step-by-step procedures and SOPs.
### Publishing or Saving your Article
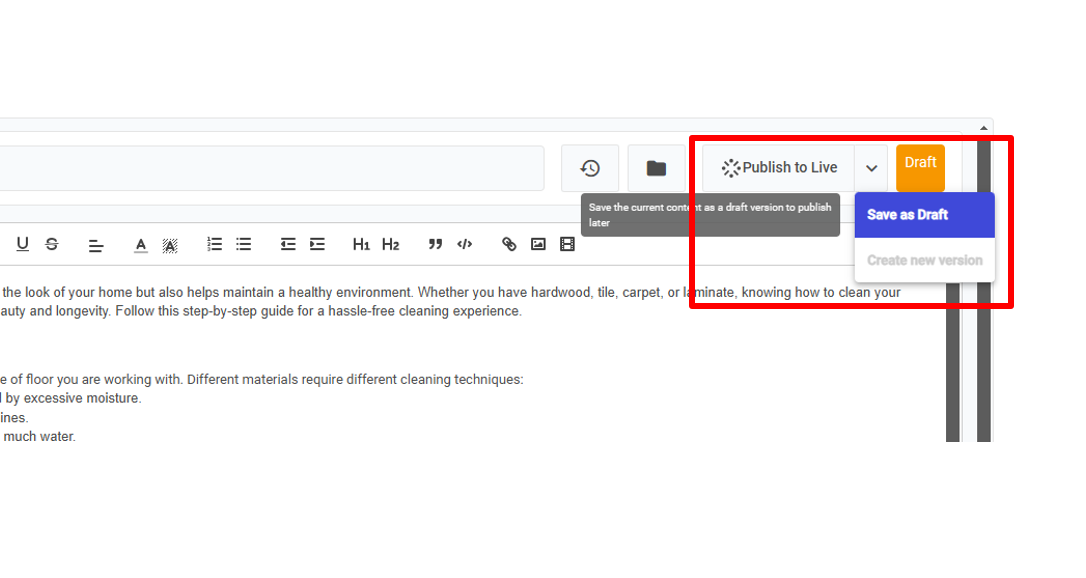
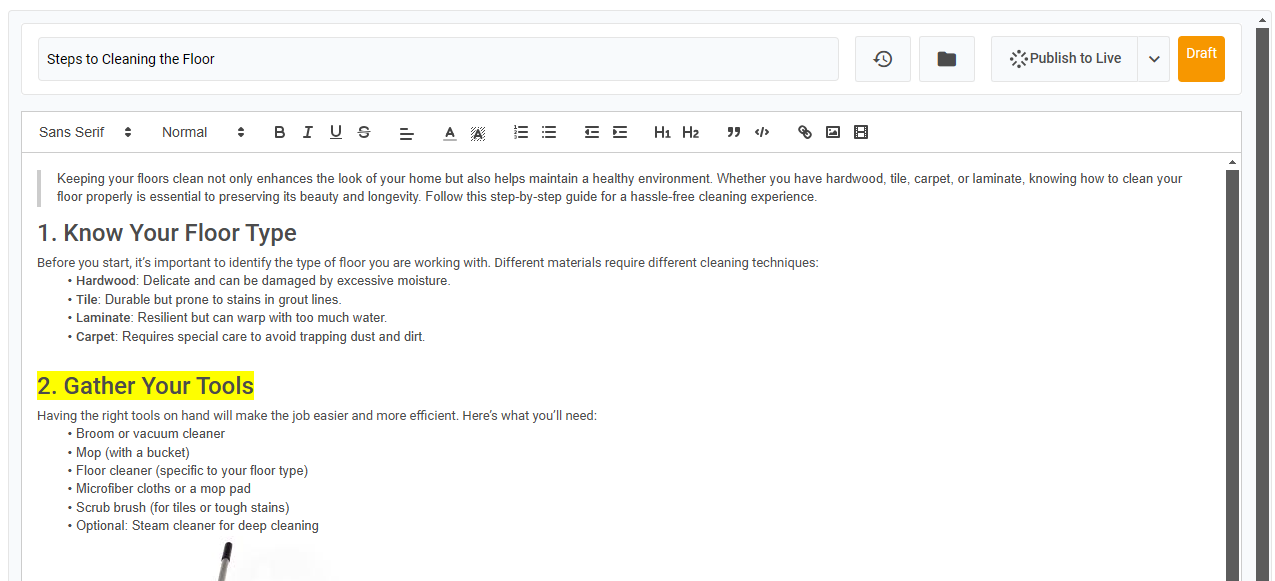
On the top right corner of your editor, you will see a button that says **Publish to Live**. Click this if you wish to make it official so that users can access and use the latest versions to complete tasks and processes.
The Orange square also indicates the current status of our Article, which is a Draft. This will change after you publish the Article. However, if you wish to keep it as draft, click on the **arrow next to Publish to Live**, and choose **Save as Draft.**
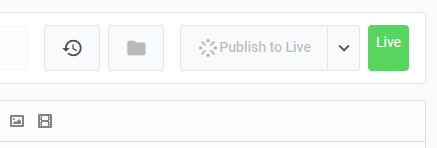
After publishing the article, the status indicator changes to a green **Live** text.
### Update an article
After publishing your Article, you may wish to change or update information.
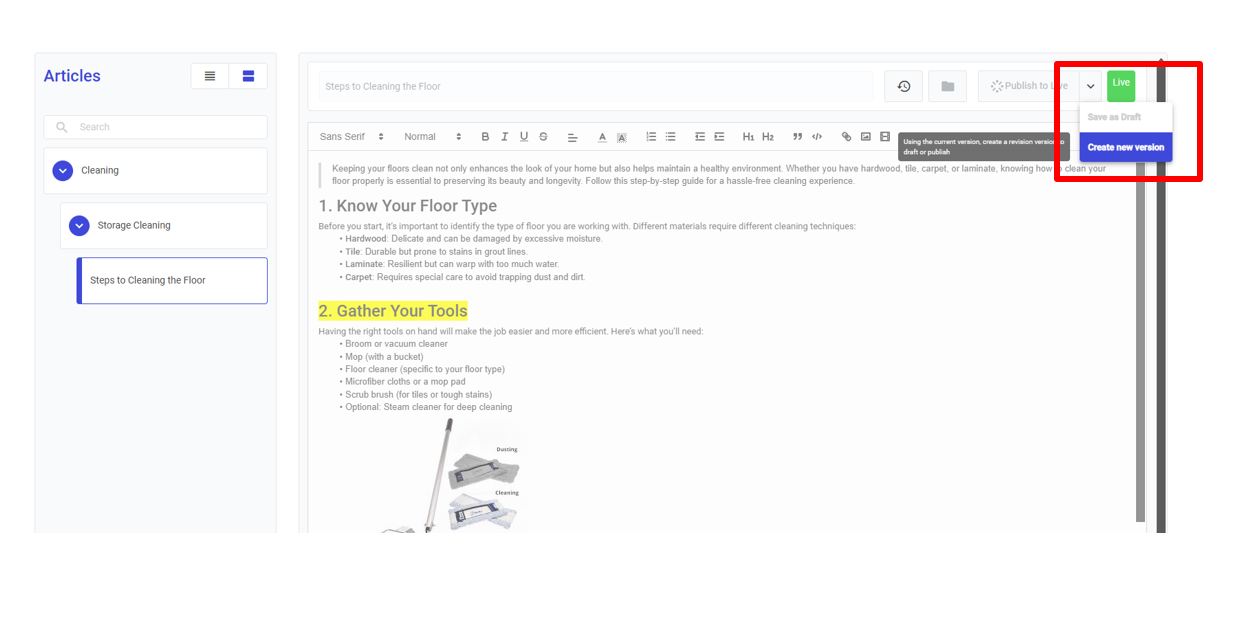
Go to your article editor based on navigation guide above. On the top right corner of your editor, click on the **arrow next to *****Publish to Live***, and choose ***Create a new version***.
Now you can get to updating your article, then publishing it or saving it as draft until you are ready.
## Delete an article
You can delete articles and folders directly in **Tree View** or **Table View**.
#### In Tree View
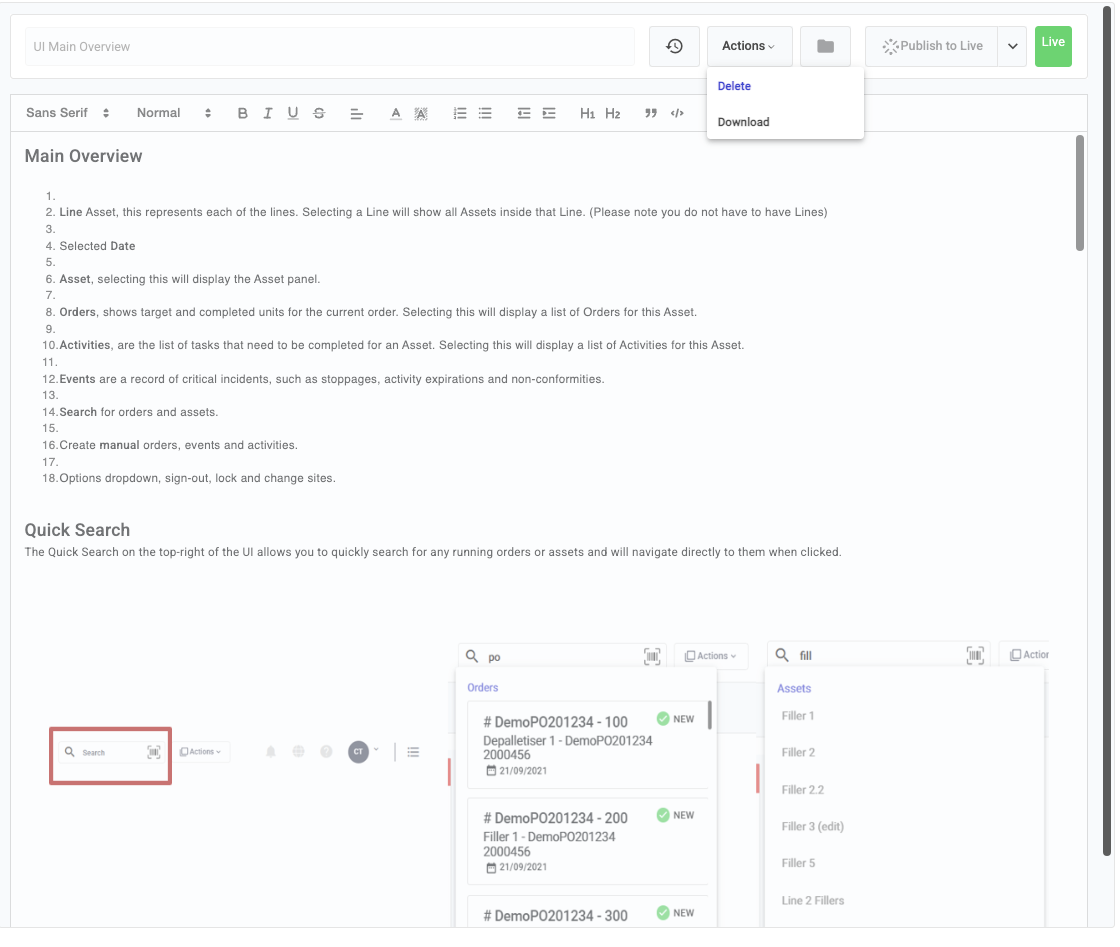
With the article open in the editor, click ***Actions*** in the toolbar and select ***Delete***. Confirm the deletion in the dialog that appears.
#### In Table View
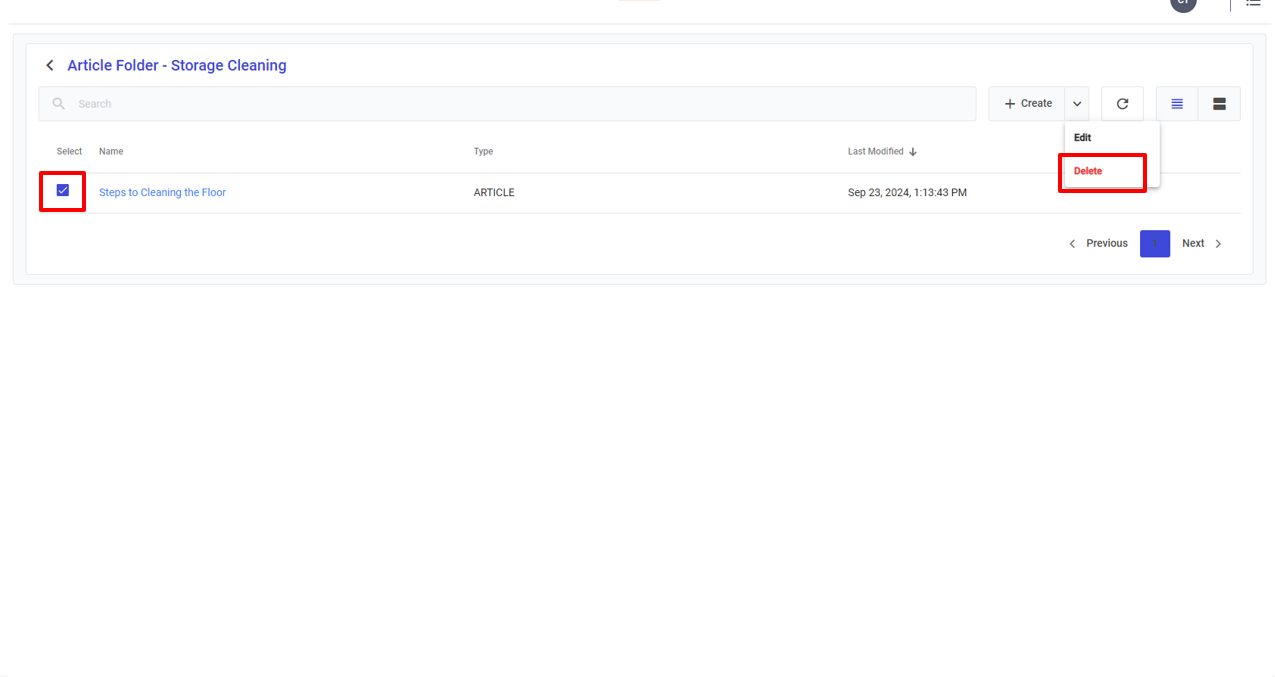
Switch to **Table View** using the view toggle at the top left. Select the article by **clicking on the checkbox next to its name**, then on the top right menu, click on the **arrow next to Create** and choose **Delete**.
## Moving an article to a different folder
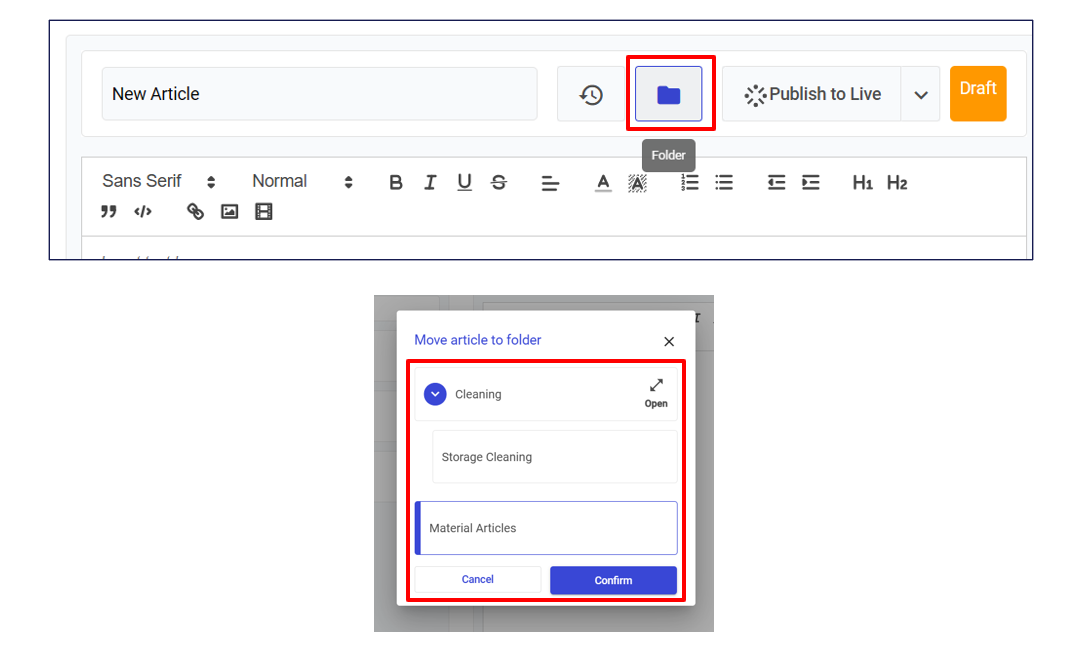
Click on the **folder icon** that is part of the top right menu. Then you will be presented with a modal to choose which folder you want to move your article to. Simply click to choose and then click **Confirm.**